Beginner Level 2: Learn AI Programming Tools
Chapter Overview
1. What Environment and Tools Do You Need to Write Code
1.1 Mindset Shift: When in Doubt, Ask AI First
Before we introduce the various environments and tools, here's an important reminder: you need to change your thinking habits.
In traditional programming learning, if you need to install Python, configure Conda, or fix an npm installation failure, you'd typically open a search engine, find a tutorial, and follow the steps one by one. If you hit an error along the way, you'd search for the error message and try again repeatedly.
Wrong! ❌
In the AI era, especially when using an AI IDE, remember one core principle: For any task, you can ask AI first, or even let it do it for you.
- Don't know how to set up your environment? Just ask AI in the sidebar: "I want to write Python. Please check if Python is installed, and if not, install it for me."
- Network stuck? If installing dependencies keeps spinning or throwing errors, just throw the error to AI: "The download failed. Is it a network issue? Can you help me switch to a different mirror source?"
- Can't remember commands? No need to memorize Git or Conda commands. Just tell AI: "Help me create a new virtual environment called demo."
1.2 Why You Need an Environment and Tools
Going from "trying to write a few lines of code" to "building a long-term maintainable project" requires completely different environments and tools.
In theory, you could write code with the system's built-in Notepad, but problems quickly arise:
- All code is plain black text — keywords, strings, and comments are all mixed together, making it hard to see the structure at a glance
- No smart suggestions — you have to type every word completely by hand, and a single typo means repeatedly checking your code
- Files become chaotic — switching back and forth between dozens of files, often unable to find the line you need to edit
- Debugging is guesswork — when the program crashes, you don't know what went wrong and can only add print statements line by line
That's why you need an IDE (Integrated Development Environment). It displays code in different colors, provides auto-suggestions as you type, organizes files by project, and lets you trace errors step by step — making development more efficient and less error-prone.
2. What Is an IDE, and Why Do You Need One
Pre-reading Tip
If you're not yet familiar with what an IDE is or what each interface element does, we recommend reading IDE Basics first to learn the basic concepts and common features.
In the early days of programming, all we needed was a simple text editor and a language processor. But as projects grew more complex, developers urgently needed a tool that could efficiently manage files, support syntax highlighting, and enable debugging — and thus the Integrated Development Environment (IDE) was born.
You can think of an IDE as a program specifically designed to "edit, manage, run, and debug" code. Early IDEs looked very "primitive" and were operated almost entirely through the keyboard.
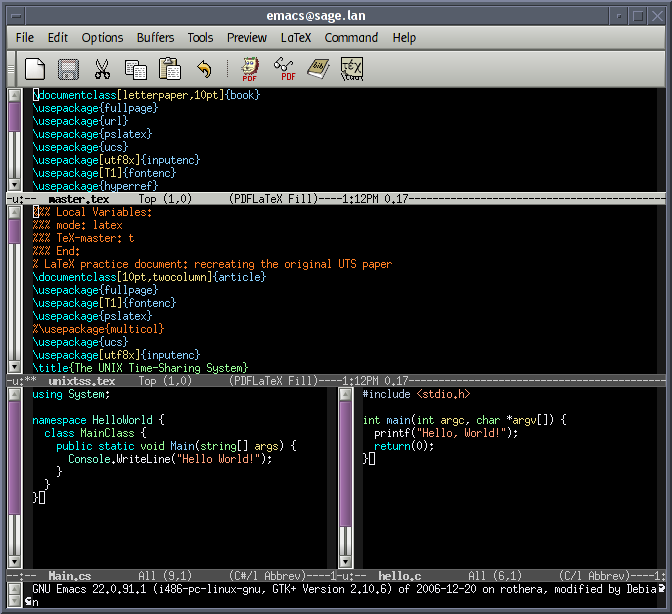
Terminal Interface — Image source: https://en.wikipedia.org/wiki/File:Emacs-screenshot.png
Well-known and mature "built-in IDEs" like Vim are commonly used for remote server operations.
For greater efficiency, we need modern IDEs that support mouse interaction, typically including:
- Source Code Editor: Syntax highlighting, auto-completion.
- Build and Run Tools: Built-in compiler/interpreter.
- Debugger: Breakpoint debugging, variable inspection.
Modern IDEs often also include built-in tools like Git. The most popular is Microsoft's Visual Studio Code (VS Code), which is lightweight and extensible. While there are also professional IDEs like the JetBrains suite, VS Code is the most beginner-friendly.
VS Code's core philosophy is "everything is a plugin." Through its plugin system, it supports various languages — install the Python plugin and it becomes a Python IDE, install the C++ plugin and it becomes a C++ IDE. Without plugins, it's just an advanced text editor.

You can even use it to edit Markdown documents.
In short, an IDE is a set of tools that helps developers write code and run programs efficiently.
For more detailed explanations, check out the Virtual IDE Visualization section in the Appendix.
3. How Is an AI IDE Different from a Regular IDE
A regular IDE (like the original VS Code) is essentially a "toolbox": You can open projects, write code, run and debug, and install plugins — but the prerequisite is that you need to know what to do and how to do it yourself:
- When there's an error, you read the message yourself and figure out which line has the problem;
- When you want to add a new page or API endpoint, you find the right file and write the code yourself;
- When you want to configure the environment or build the project, you look up the documentation and follow the steps yourself.
But in an AI IDE, you can directly use a large language model to help you code and modify files:
- Just say "make a login page," and it generates the basic code structure first;
- Throw the error message and related code at it, and let it analyze the cause and suggest fixes;
- After you confirm, let it automatically create files, batch-edit code, and handle cross-file grunt work.
For example, you can select a piece of code and ask it to "refactor this" or "add comments." You can also ask in the sidebar "How is this project designed?" and specify the reference scope using @filename or @entire project, completing the tedious operations of creating files, writing code, and running with a single sentence.
In the latest version of VS Code, a large language model assistant is already built in. You can have conversations with the model about the entire codebase, a specific file, or even a specific function. You can also use it like the auto-coding tools you used on the web — send your requirements as prompts to the built-in coding Agent, and let it automatically implement the features you need, create files, modify code, configure environments, and more.
You can download and install VS Code, click the sidebar entry in the top-right corner, and open the AI feature area to experience these capabilities.
However, VS Code is not the IDE with the strongest AI capabilities. For scenarios that require heavy AI-assisted coding, we often want to use "smarter, more efficient" tools — a good AI IDE can significantly save time on writing code and fixing bugs. Below we'll introduce several popular AI IDEs. You can choose any AI IDE based on your personal preference.
Since VS Code is open source (anyone can download the source code and compile it themselves), the vast majority of AI IDEs on the market today are built on top of VS Code. So you don't need to worry about "learning many different IDEs" — as long as you're familiar with the basics of VS Code, migrating to these AI IDEs doesn't require starting from scratch.
Generally speaking, the differences between AI IDEs mainly come down to four aspects: pricing; available model types (some advanced models may be restricted in certain regions); Agent capabilities (how smart and capable it is at assisting with coding); and speed and performance. You can choose based on your own testing results — the best tool is the one that works best for you.
Typical AI IDEs generally have the following core capabilities:
- Smart Code Generation and Completion: In traditional IDEs, we typically type a few characters to auto-complete variable or function names. In modern AI IDEs, you can write a few lines of pseudocode or simply describe your requirements, and the IDE will auto-complete the full logic, or even generate large blocks of code based on instructions.
- Code Understanding and Q&A: The IDE can understand and answer questions about a specific piece of code, a file, or even the entire project directory structure.
- Code Refactoring and Optimization: The IDE can rewrite or optimize the implementation logic of specified code snippets based on your intent.
- Automatic Test Generation: The IDE can automatically generate test code for different functions and modules, making it easy to perform targeted testing.
- Agent-style Task Execution: Smart Agents can automatically generate, build, install, run, and modify code, partially replacing the work of junior software engineers in many tasks.
Antigravity
Antigravity
Antigravity is a brand-new AI IDE released by Google in November 2025 alongside Gemini 3, adopting an "Agent-First" development model. Unlike traditional AI-assisted coding, Antigravity makes the AI agent the "active executor," capable of directly operating the editor, terminal, browser, and other tools, taking on more "execution," "planning," and "verification" work. Developers only need to express high-level intent, and the agent will automatically break down tasks, create plans, execute code, run tests, and generate results. It supports multi-model switching, including Gemini 3 Pro, Claude Sonnet 4.5, and more. It's currently available as a public preview, supporting Windows, macOS, and Linux.
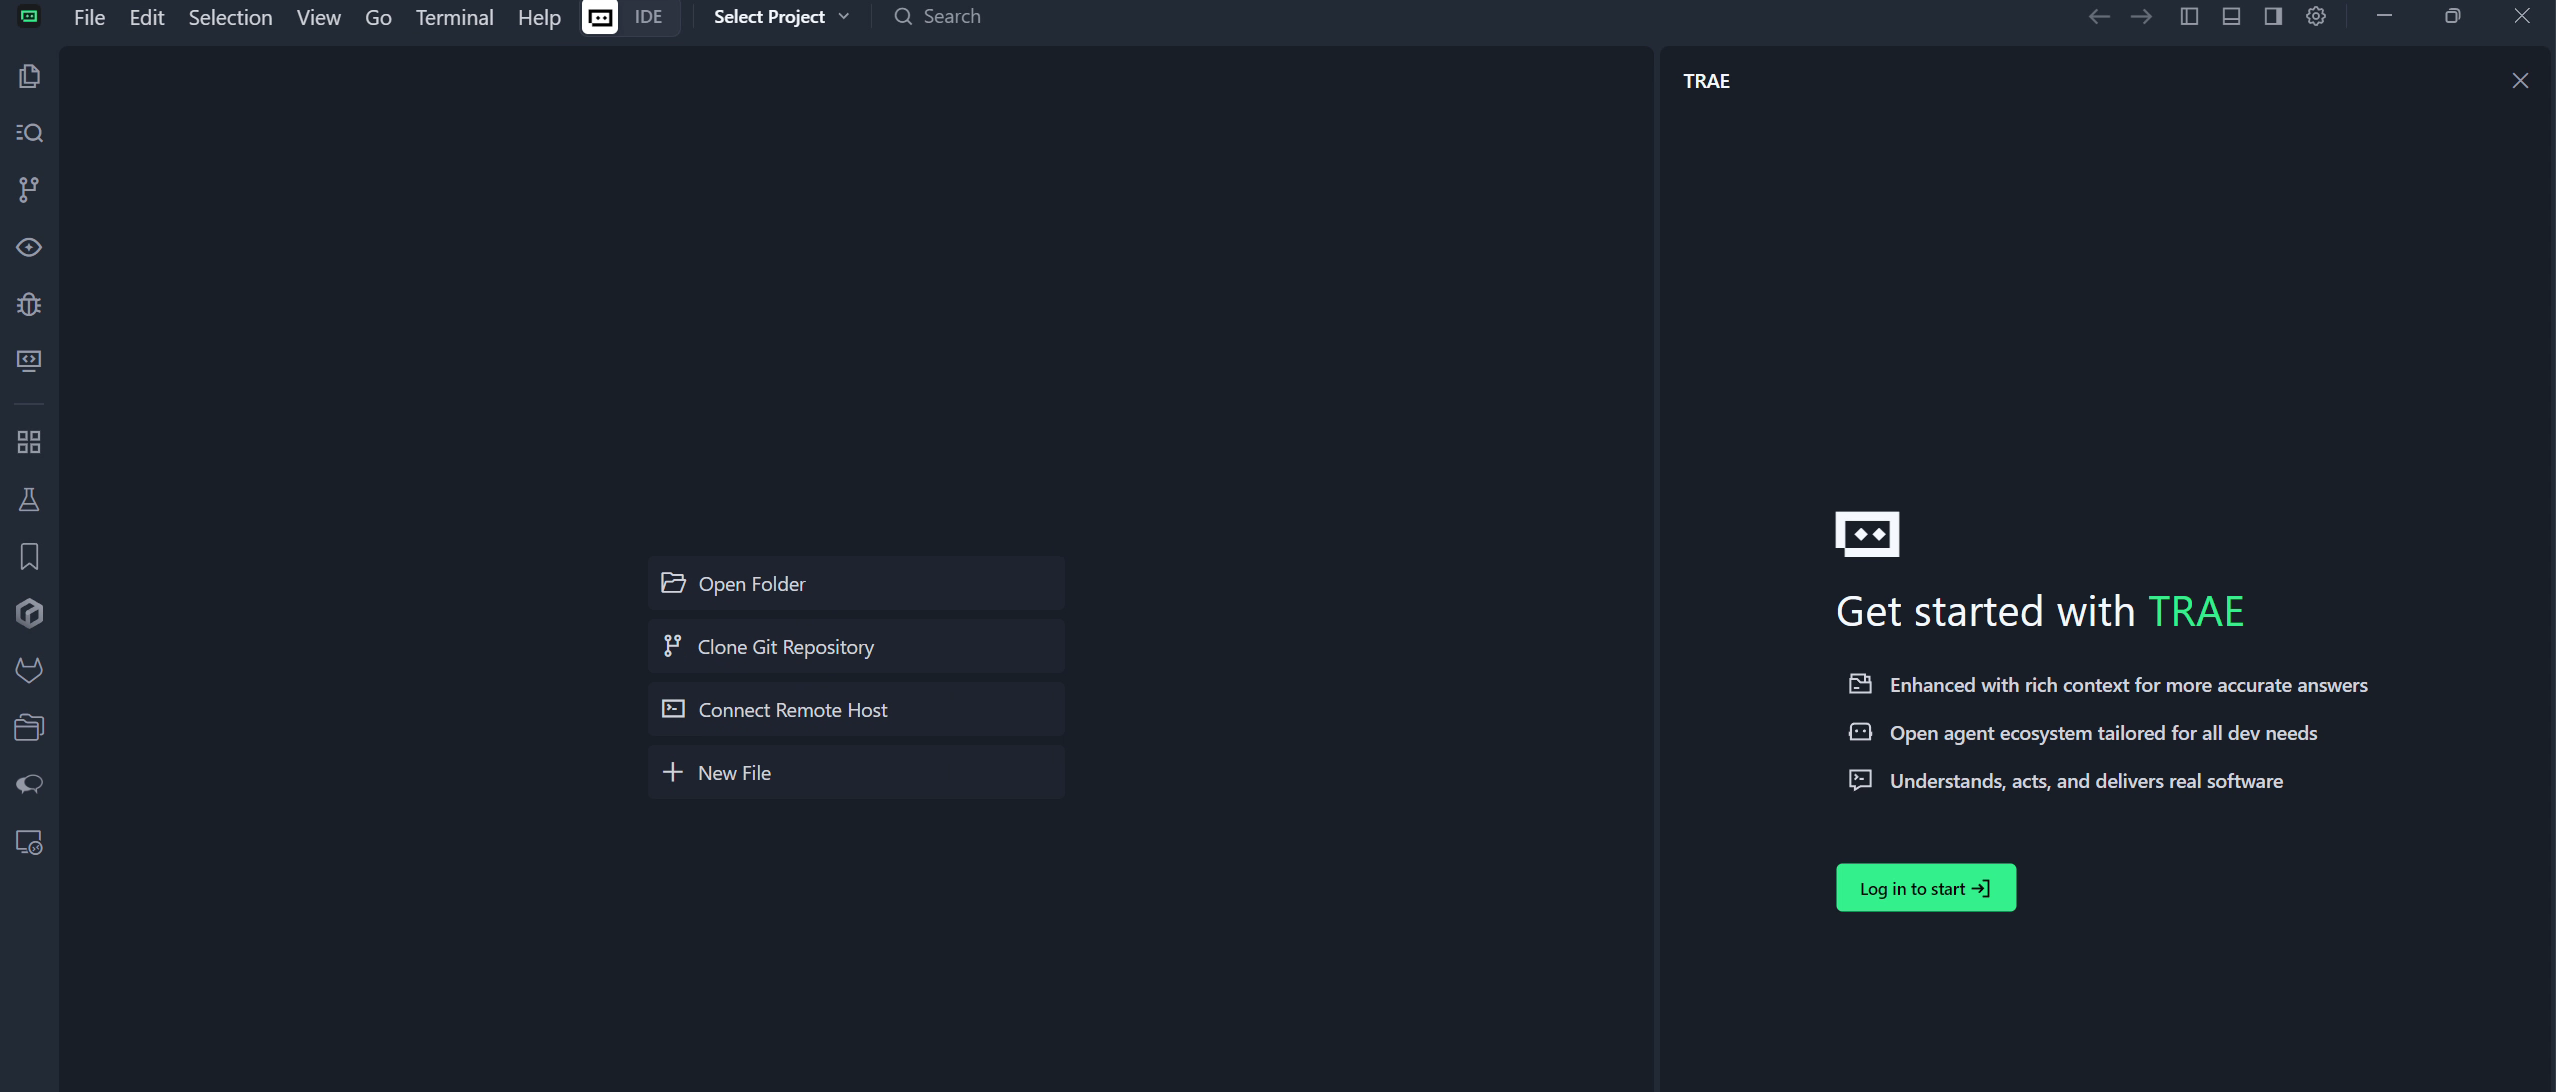
Trae
Trae

Trae is an AI programming assistant developed by ByteDance that supports over 100 programming languages and can be integrated into mainstream IDEs. Its features include: generating code from natural language, automatic debugging, and converting design mockups into React/Vue components. After its August 2025 update, Trae added smart dependency imports, rename suggestions, task checklist management, and more. SOLO mode also began supporting backend code generation and technical architecture document editing.
Cursor
Cursor
Cursor is an AI code editor developed by Anysphere, built on a customized VS Code, with optimizations focused on large-scale codebases and multi-file collaboration scenarios. It supports models like GPT-4o and Claude 3.7. The Claude Max mode introduced in 2025 can handle projects with millions of lines of code. The Pro version removed request limits, making it ideal for complex enterprise projects.
Currently, Cursor is arguably one of the best AI IDEs with a graphical interface in terms of overall experience, with a large user base and frequent feature updates. Its biggest drawback is the higher price — the Pro version costs about $20 per month.

Qoder
Qoder
Qoder is an AI IDE from Alibaba that emphasizes "transparent collaboration" and "enhanced context engineering capabilities." It supports breaking tasks into multiple steps through Action Flow and tracks AI execution in real time. It also supports multi-model dynamic routing and task state machine management, making it ideal for architecture governance in medium-to-large projects and "reverse engineering" analysis of legacy systems.
CodeBuddy
CodeBuddy
CodeBuddy is an AI programming tool from Tencent Cloud that emphasizes Chinese language command support and enterprise-grade compliance capabilities. It offers code completion, batch code review, and multi-model switching. Its Craft agent can perform multi-file code generation and API integration. The enterprise version supports private deployment and has passed Level 3 security certification, making it suitable for industries with high data security requirements such as finance and healthcare.
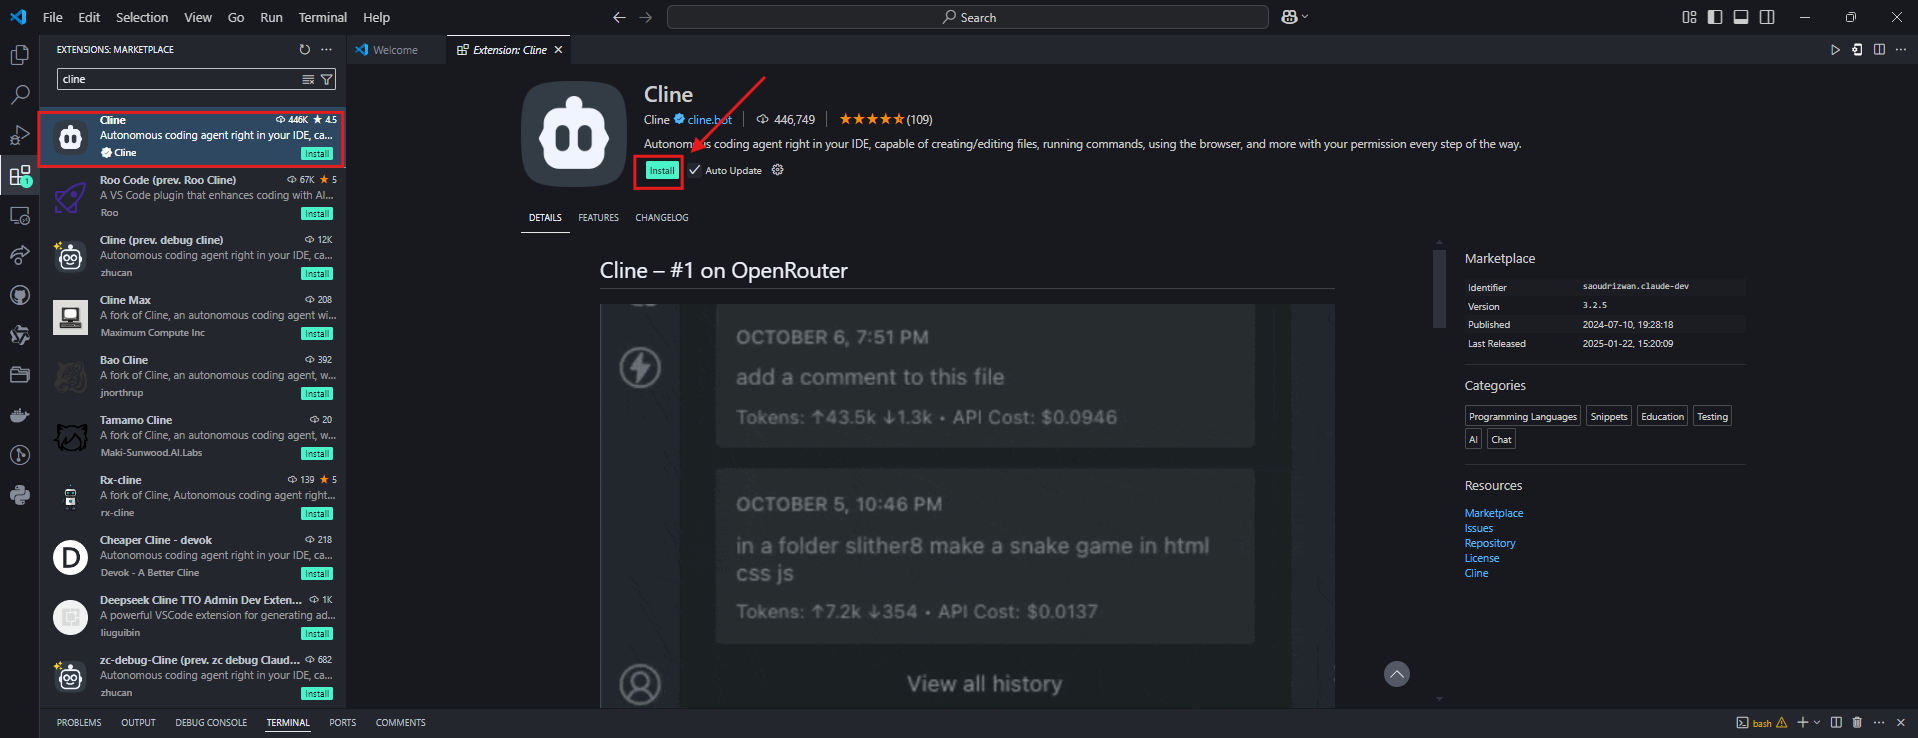
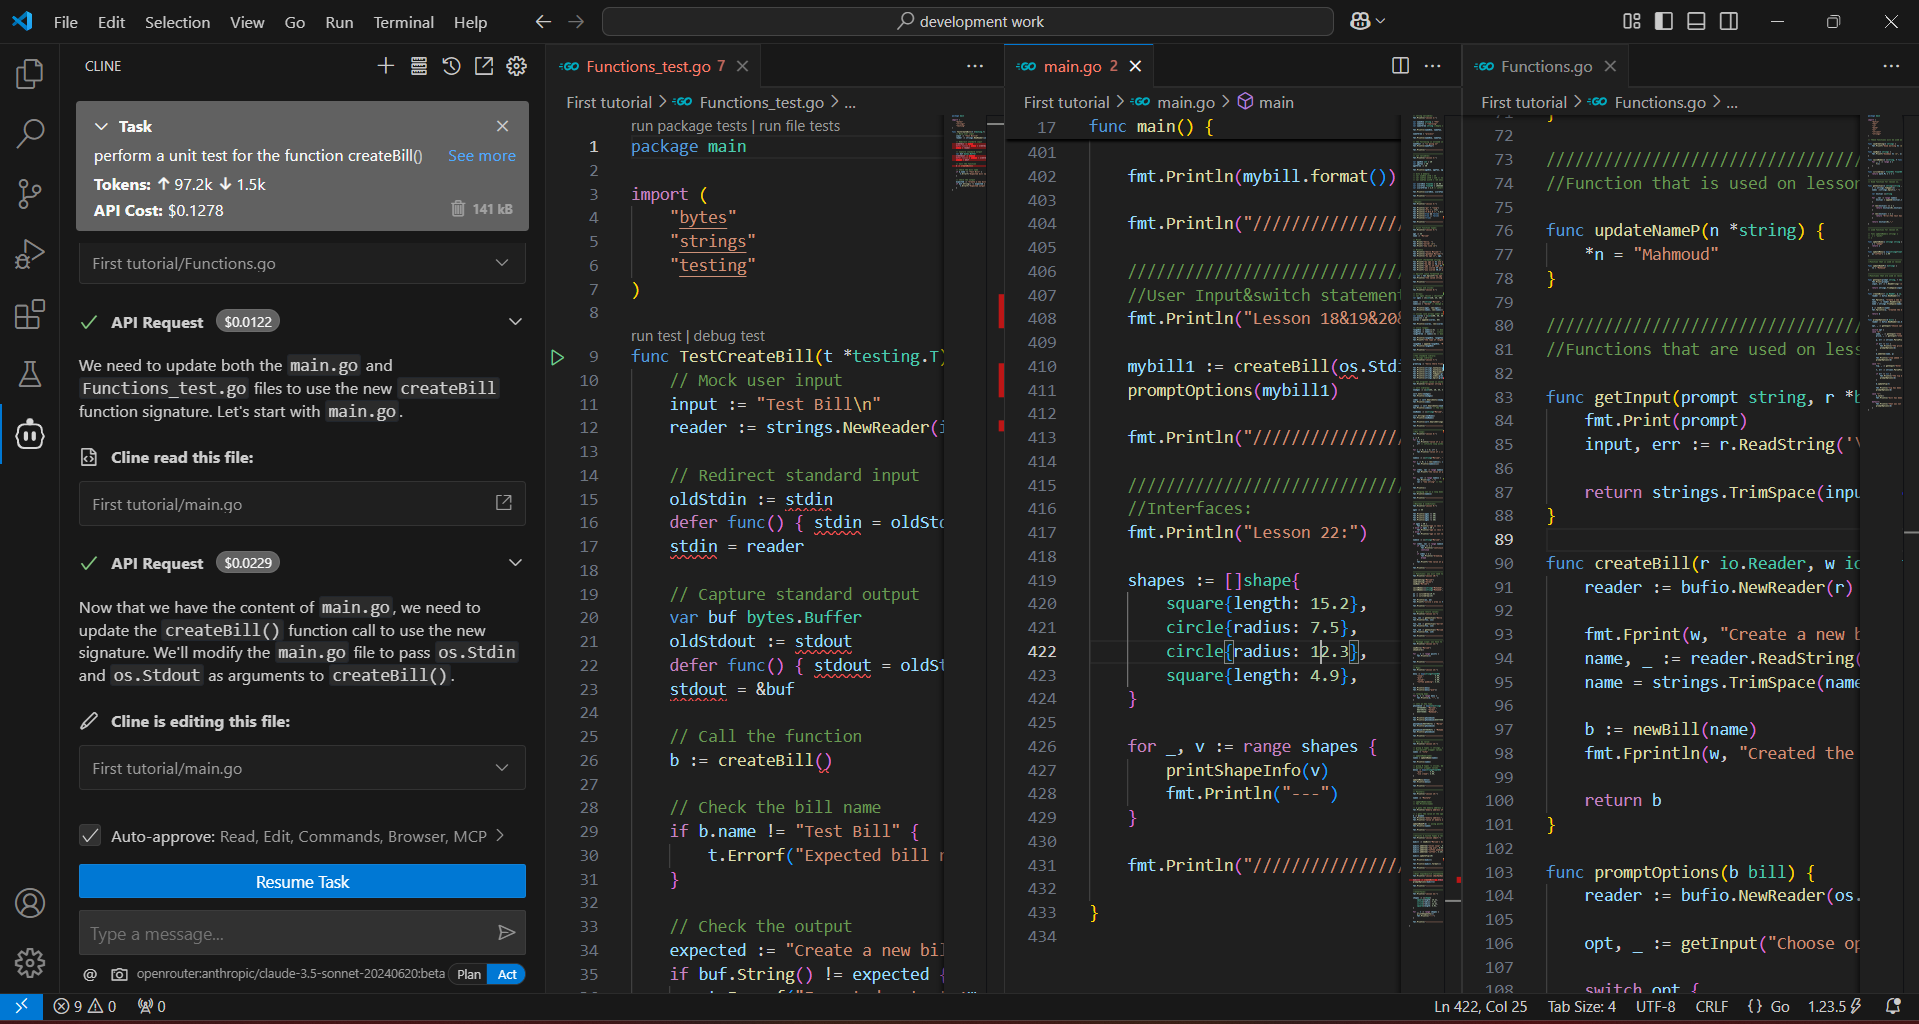
VS Code + Cline
VS Code + Cline
Cline is an AI programming Agent plugin for VS Code (Visual Studio Code) that can flexibly switch between different large models by configuring different API endpoints. Cline supports multimodal input, MCP tool extensions, and cost monitoring, with all operations requiring user confirmation before execution. It's ideal for quickly validating ideas or integrating with existing development workflows. Basic features are free, and the enterprise version supports deploying models in private environments.
Kiro
Kiro
Kiro is an AI programming IDE from AWS (Amazon Web Services), deeply integrated with Amazon Bedrock and the AWS cloud service ecosystem. It supports multiple large models including Claude and Nova, making it particularly suitable for development scenarios that require tight integration with AWS cloud services. Kiro provides smart code generation, automated testing, and seamless integration with AWS resources (such as Lambda, S3, DynamoDB), offering unique advantages for cloud-native application development.
Note: If you want to use Anthropic Claude models, you'll need to use Cursor, Kiro, or Antigravity as your IDE. These IDEs have official partnerships or deep integrations with Anthropic, providing a more stable and complete Claude model experience.
4. Hands-on: Build a Snake Game Locally with an AI IDE
The previous sections were mainly about "concepts" and "differences." In this section, we'll turn abstract concepts into concrete actions through a complete hands-on exercise: Create a new empty folder -> Open it with an AI IDE -> Chat in the sidebar and have it build a Snake game from scratch using React. Here we'll use Trae as our example, so first we need to install it and understand what Trae is.
💡 Quick Tip: Seamless Transition from Web to Local
If you've previously developed projects on z.ai or other web-based AI programming platforms, you can download the code directly to your local machine and open it with an AI IDE to continue development. This way you can keep your previous work while enjoying the more powerful AI assistance of a local IDE.
The steps are simple:
- Click the download button on platforms like z.ai to save the project locally
- Unzip and open the folder with an AI IDE like Trae/Cursor
- Continue chatting with AI in the sidebar to iterate and improve your project
4.1 Preparation: Install and Learn About Trae
4.1.1 What Is Trae
Trae's full name can be understood as "The Real AI Engineer." It's an adaptive AI Integrated Development Environment (IDE) developed by ByteDance. It's built on top of the popular VS Code, which means if you're already familiar with VS Code, you'll find Trae's interface layout and basic operations very familiar and comfortable.
Trae's core goal is to be a developer's "smart programming partner." Through deep AI integration, it can automatically handle a large amount of repetitive work, providing you with a more intuitive and efficient development experience. It's not just a "code completion tool" — it aims to assist throughout the entire development workflow, from creating projects, writing code, debugging, testing, to deployment.
4.1.2 Installing Trae
Trae comes in an international version and a China version. The international version requires access to overseas networks but lets you use the latest overseas models like GPT-5. The China version primarily supports the latest domestic large models such as GLM, Qwen, Kimi, etc.
International version download: https://www.trae.ai/ China version download: https://www.trae.cn/
Trae Pricing and Usage Options
💡 Version Selection Tips (CN Version Recommended for Beginners)
- For beginners, we strongly recommend downloading the China version (CN version, trae.cn) — it currently provides a better overall experience and is free to use, with no overseas network required
- If you need to use overseas models like GPT-5 and your network conditions allow it, you can choose the international version
- If you already have a third-party model API Key, connecting third-party models gives you flexible cost control
💡 Currently recommended: Use OpenRouter free models for testing
As of the time this tutorial was written (2026-02-12), you can still try StepFun's models for free. See section 4.2 below for how to connect the model
stepfun/step-3.5-flash:free.
Regarding Trae's costs and usage options, here are several choices:
- China Version CN (Strongly Recommended): Basic usage is free, and it currently provides a better overall experience than the international version — ideal for beginners. Due to high user volume, you may occasionally need to wait in a queue.
- International Version: Subscription costs about $3 per month, giving access to overseas models like GPT-5, but requires overseas network access.
- Third-party Model Integration: If you already have a Token API from a domestic large model provider (such as DeepSeek, Tongyi Qianwen, Kimi, etc.), you can connect these APIs through Trae's third-party model configuration. Major cloud service providers (such as Alibaba Cloud, Tencent Cloud, Baidu Cloud, etc.) typically offer Coding Plan subscriptions that let you use their large model APIs at more favorable prices. This way you can freely choose your preferred model while controlling costs.
We recommend beginners start with the free China CN version (download: https://www.trae.cn/), which currently offers a better experience and is completely free. If you encounter queuing issues or need more stable service, consider connecting a third-party model and purchasing the corresponding cloud provider's Coding Plan.
4.1.3 Trae Interface Overview
In terms of interface design, Trae is very similar to the VS Code we use daily: the same classic three-column layout with a file explorer on the left, an editing area in the center, and an extension panel on the right.
The sidebar on the right is the Copilot interaction window, which can also be thought of as the Agent window. If you can't see it right away, click the sidebar icon in the top-right corner of Trae to open it.
After opening the sidebar, you'll see a Builder option — this is the Agent mode. Simply put, it's like a "local version" of z.ai that can operate your local environment, install runtime environments, open web pages, and more.
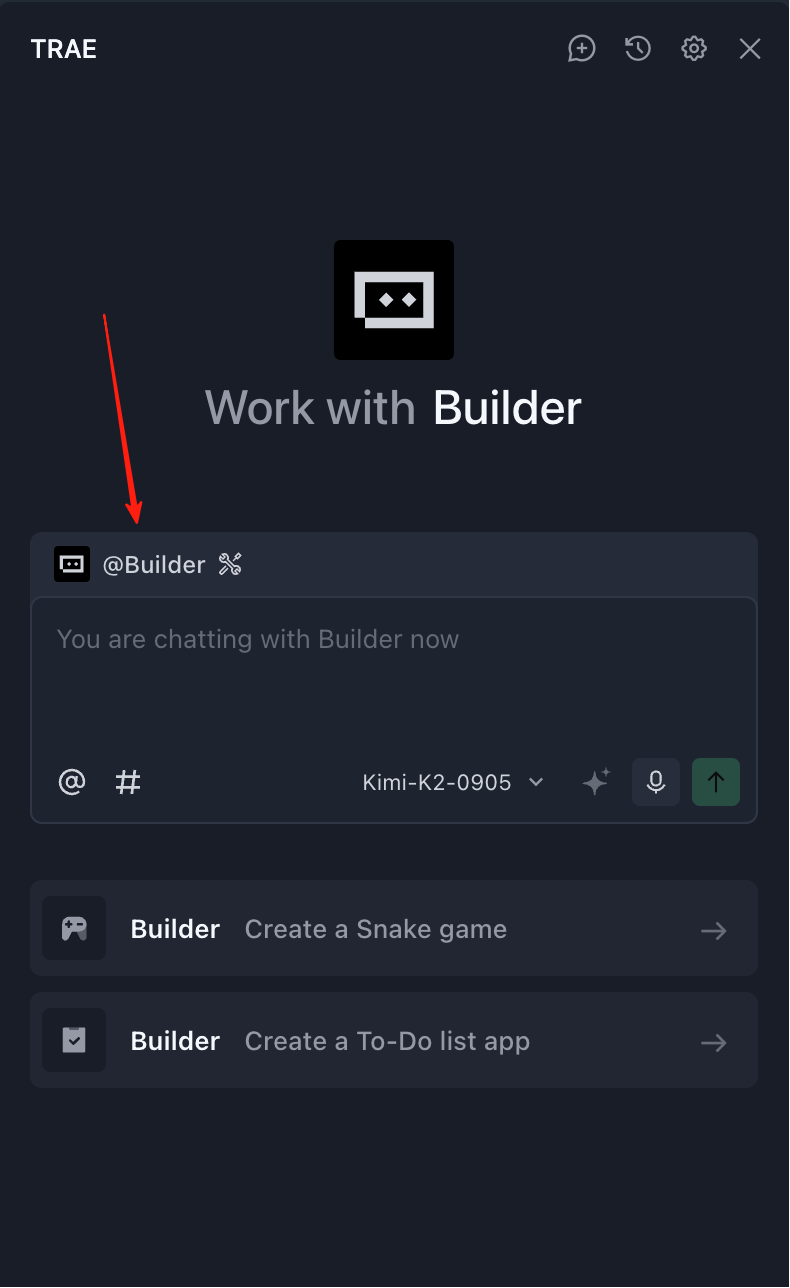
After clicking "Builder," you'll see "Chat" mode and "Builder with MCP" mode:
- Chat Mode: Primarily used for chatting about the code in your current folder, or as a general chat model. (You can open a folder through the "File" menu in the top-left corner and edit within that folder. In this case, any files Builder creates or modifies will only happen inside this folder.)
- Builder with MCP Mode: Provides the Agent with more available tools (such as connecting the language model with other software, querying weather, etc.). You can simply understand it as: MCP makes it easier for the language model to call various external tools.

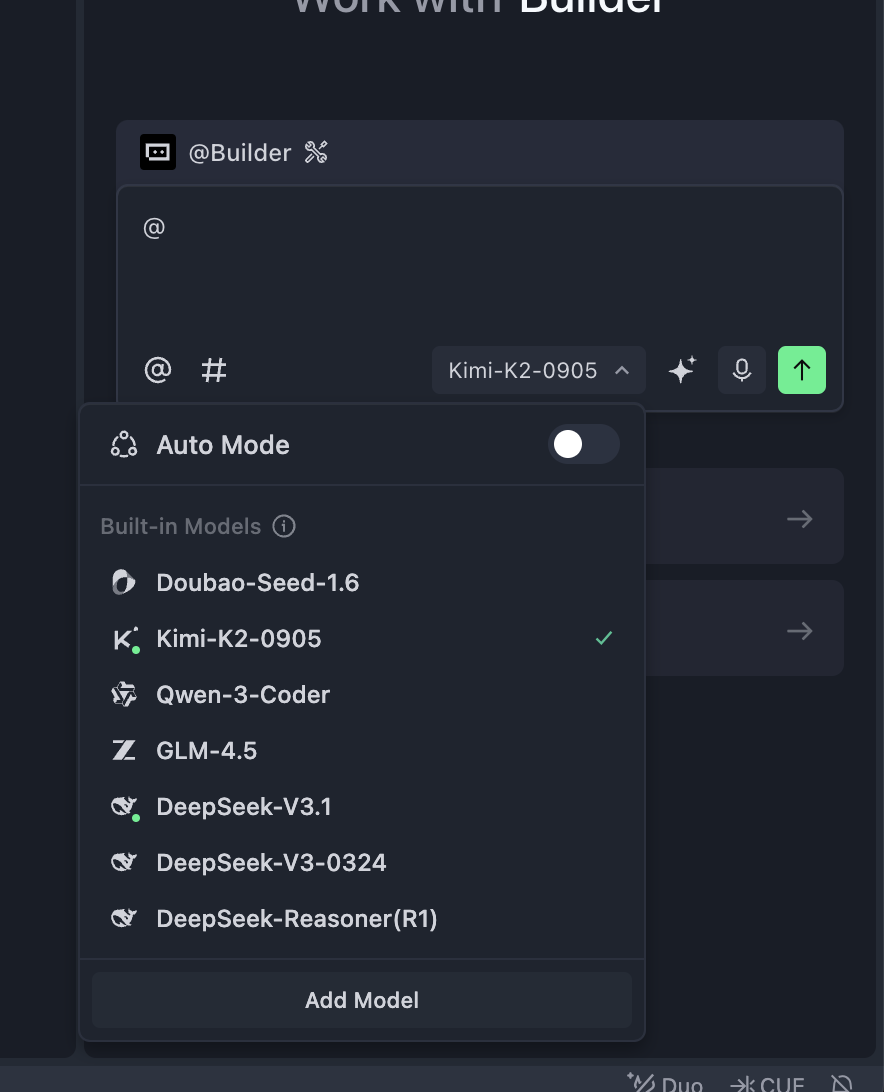
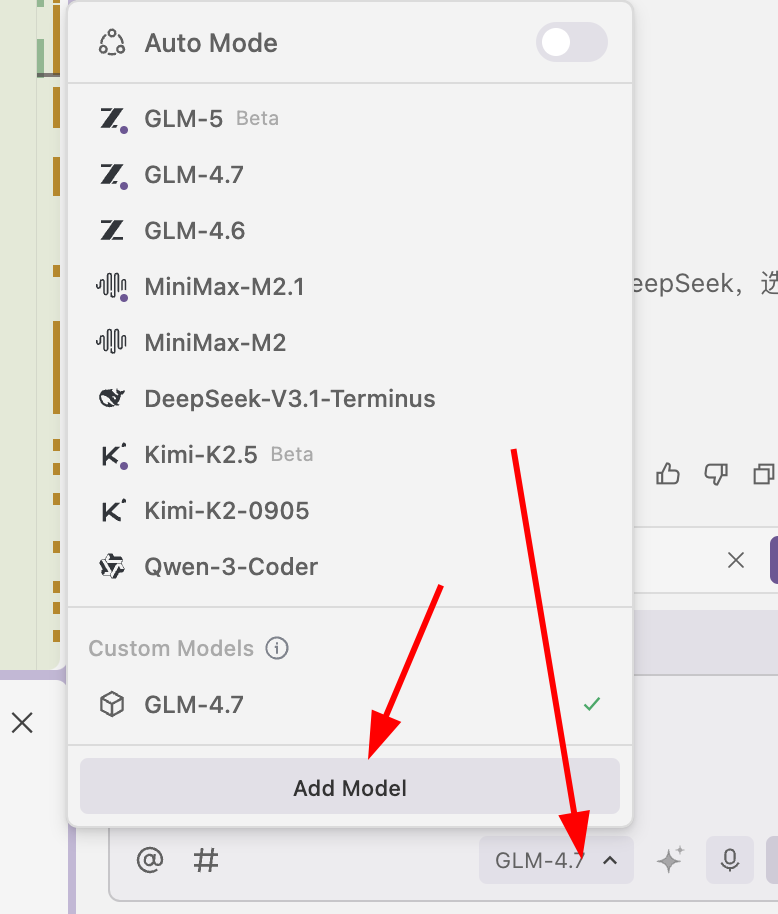
In the area below, you'll also see model selection options — click to change the current large model. In the China version, you can choose domestic models like Kimi k2 or GLM. If you're using the international version of Trae, you can also select overseas models like ChatGPT or Claude. However, since domestic large models are developing very rapidly, Kimi, Qwen, GLM, and others already offer experiences close to Claude 3.5 or 3.7 in many tasks, which is more than sufficient for daily development. There's no strict requirement to use the international or China version here.
Note that we don't recommend using Auto mode (automatic model selection). For the international version, we recommend using Gemini or GPT models. For the China version, we recommend trying domestic models like Kimi k2, Minimax, or GLM. Different models suit different use cases — there's no dogmatic rule about which is better. When you hit a wall with one model, try switching to another. Through multiple tests, you'll find the best results for your own workflow.
That's a brief introduction to Trae. Next, let's revisit what we did previously on z.ai and try doing the same thing in Trae.
4.2 Step 1: Create an Empty Folder and Open It with an AI IDE
Before getting started, we first need to prepare a clean project working directory. For this section's example, you can create a new empty folder named snake-game-react on your local machine.
Then, open your installed AI IDE, select "Open Folder" on the startup screen, and import the empty folder as the project root directory. You can also drag the folder directly into the IDE window to open it. At this point, the file explorer on the left won't show any code files, indicating that we're starting from a completely blank project state.
📚 Optional: Connect a Cloud Service Provider's API or Coding Plan
This section introduces how to connect a cloud service provider's API or Coding Plan for more stable and frequent model calls. Screenshots of the Trae integration are provided at the end.
What Is a Coding Plan
A Coding Plan is a subscription offered by major cloud service providers. After purchasing, you can use the provider's large model API without limits or at high frequency for a certain period. Compared to per-token billing, a Coding Plan is more like a "monthly package" — you pay a fixed fee and can use it freely without worrying about per-call charges.
Why Purchase a Coding Plan
You might ask: since you can call large models directly via API, why buy a Coding Plan? The main reason is: unlimited usage. The core advantage of a Coding Plan is that you can call the large model anytime, as frequently as you want, without worrying about costs exploding or constantly checking billing statements.
Recommended Domestic Cloud Service Coding Plans
Here are recommended Coding Plan options from major domestic cloud service providers:
- Zhipu AI (BigModel Plan): https://bigmodel.cn/glm-coding
- Volcengine (ByteDance Cloud AI Plan): https://www.volcengine.com/activity/codingplan
💡 You can also directly connect a large model API Besides Coding Plans, you can also directly connect various model APIs through Add Model. You can refer to the method below for connecting the OpenRouter StepFun free API to integrate it with Trae. Testing shows it meets basic programming needs. If you need to top up, we suggest starting with a small amount (e.g., 10 RMB) to see how long it lasts, such as with cost-effective models like DeepSeek.
How to Connect a Coding Plan
Connecting a Coding Plan is very simple and takes just a few minutes:
- Visit your chosen cloud service provider's website (e.g., Zhipu AI: https://bigmodel.cn/glm-coding, Volcengine: https://www.volcengine.com/activity/codingplan)
- Register an account and log in
- Find the "Pricing" or "Coding Plan" page
- Choose a plan that suits you and complete the payment
- After payment, you'll receive an API Key or Plan ID
🎯 Custom Model Recommendations
When connecting custom models in Trae, we recommend using the OpenRouter approach by default. OpenRouter provides a unified API interface for conveniently connecting to multiple large language models.
As of February 12, 2026, you can still use StepFun's free API:
stepfun/step-3.5-flash:free: A free model from StepFun that can be directly connected in Trae.
Other free models:
openrouter/free: A model option that uses free LLM APIs by default. You can use it directly in Trae's Custom Model integration (just enter the model ID), experiencing AI programming features without any cost.
These free options are great for beginners. Before committing to production use, you can familiarize yourself with the AI IDE workflow through these free options.
Optional: Connect a Large Model API (Using DeepSeek as an Example)
- Visit the DeepSeek platform: https://platform.deepseek.com/usage
- Register an account and log in
- Purchase a 10 RMB token package on the top-up page
- After topping up, create and copy an API Key on the API Keys page
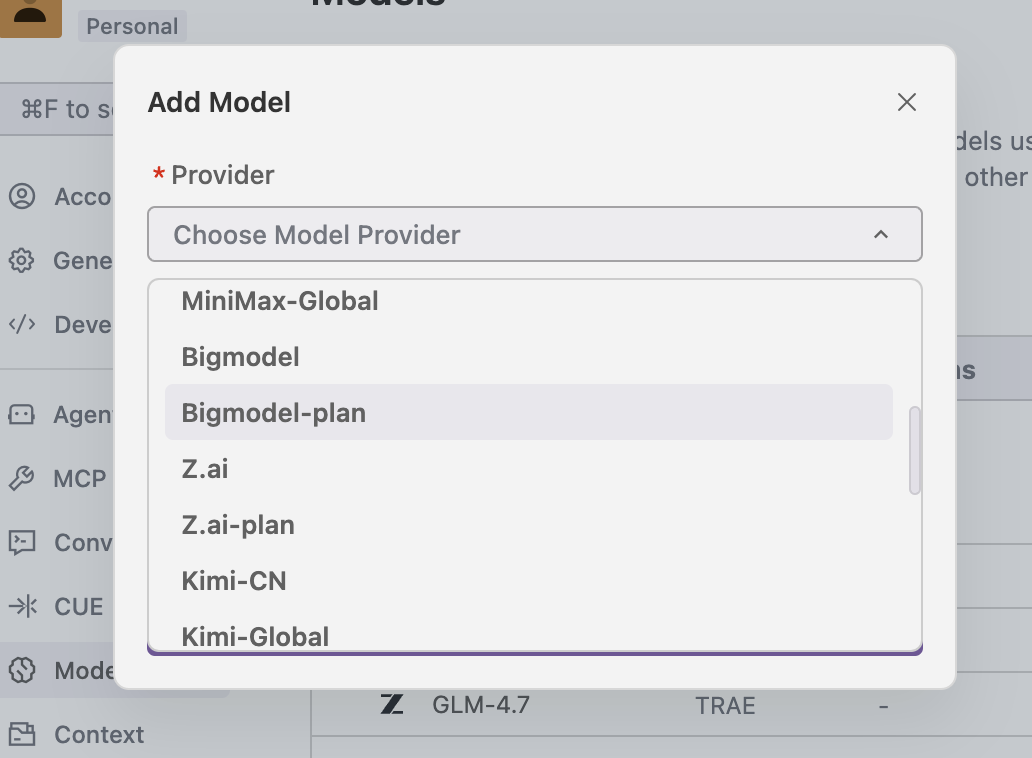
- In Trae, click "Add Model", find DeepSeek, select the corresponding model, and enter the API Key to start using it
Through the interface below, you can successfully add a model (note: after selecting the model option, make sure to scroll all the way to the bottom — there's a "Custom Model" option. Click it to enter a model ID, where you can type the recommended model IDs like stepfun/step-3.5-flash:free. Also click "Get Key" below to visit the official website and obtain the corresponding API Key.)
4.3 Step 2: Chat in the Sidebar and Have AI Design a Snake Game with React
Next, open the AI chat sidebar: usually by pressing Ctrl+L or clicking the chat icon on the right. Then enter a clear prompt:
Please implement a Snake game using React architecture, including keyboard controls, growing and scoring when eating food, and displaying "Game Over" with restart support when hitting walls or itself. After implementation, help me start this project. If any program environment is not installed, automatically install the missing environment.
During this process, you need to realize that AI is not just a chat model—it can help you operate your local environment: creating files, installing dependencies, executing startup commands, etc. You can directly describe your goals in natural language, and let AI decide which specific commands to execute and how to organize the code.
If problems occur during execution, AI will display errors and solutions in the conversation. You can continue to have it adjust through dialogue without having to remember all command details yourself.
⚠️ Important Note
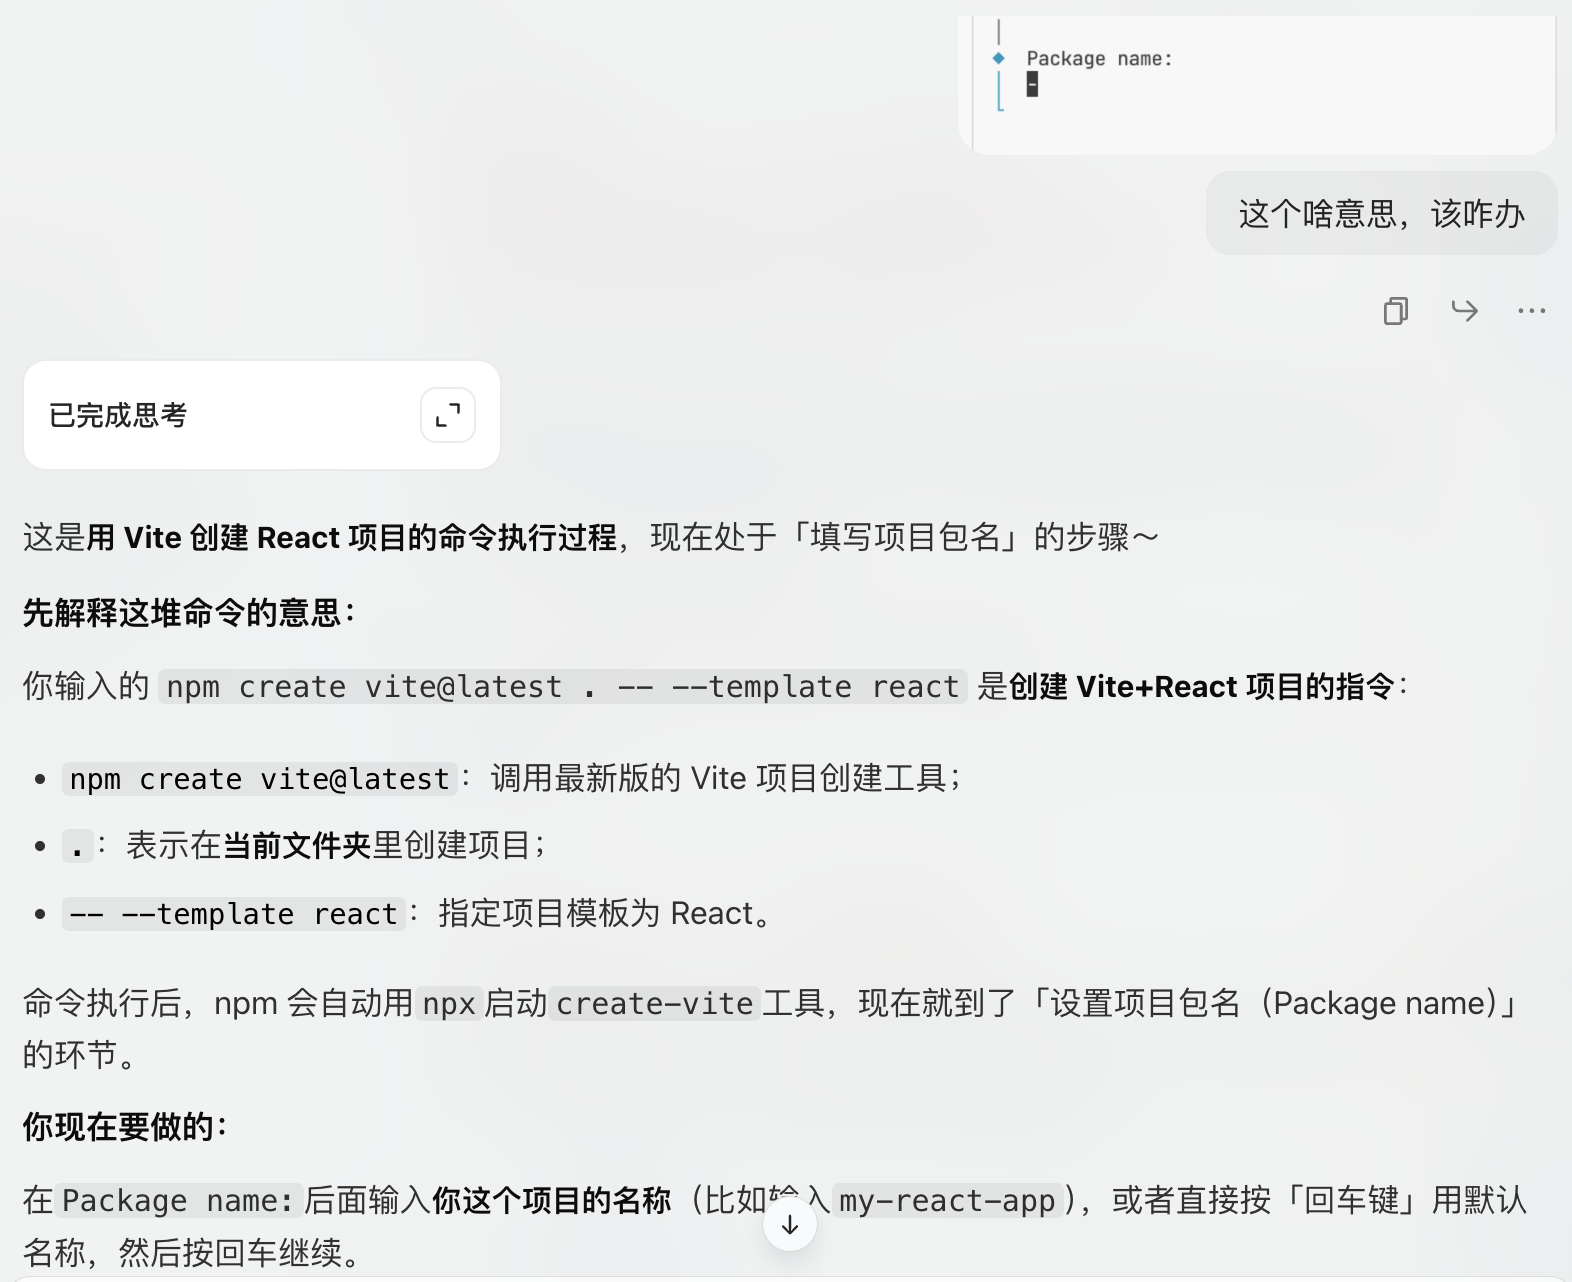
As shown in the figure below, sometimes the AI Agent will pause during execution because it needs to wait for you to input some information for interaction, such as entering a created name, or pressing Enter to confirm command execution, or clicking a command to execute. Usually we just press Enter directly. If you're unsure what this step requires, you can take a screenshot of the current interface and ask the large model what operation should be performed.
As shown, here we need to click Run to confirm: 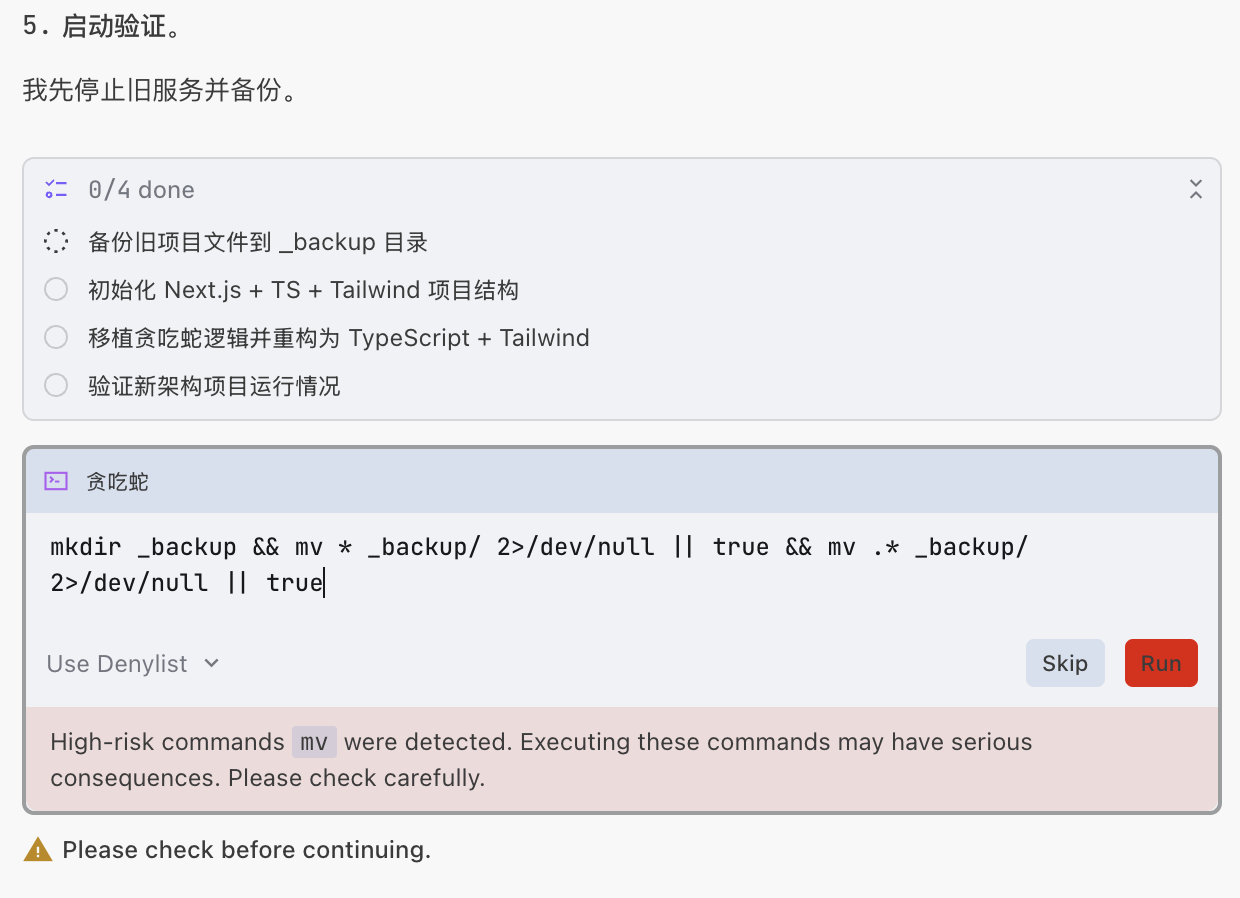
As shown, here we just need to input y to confirm: 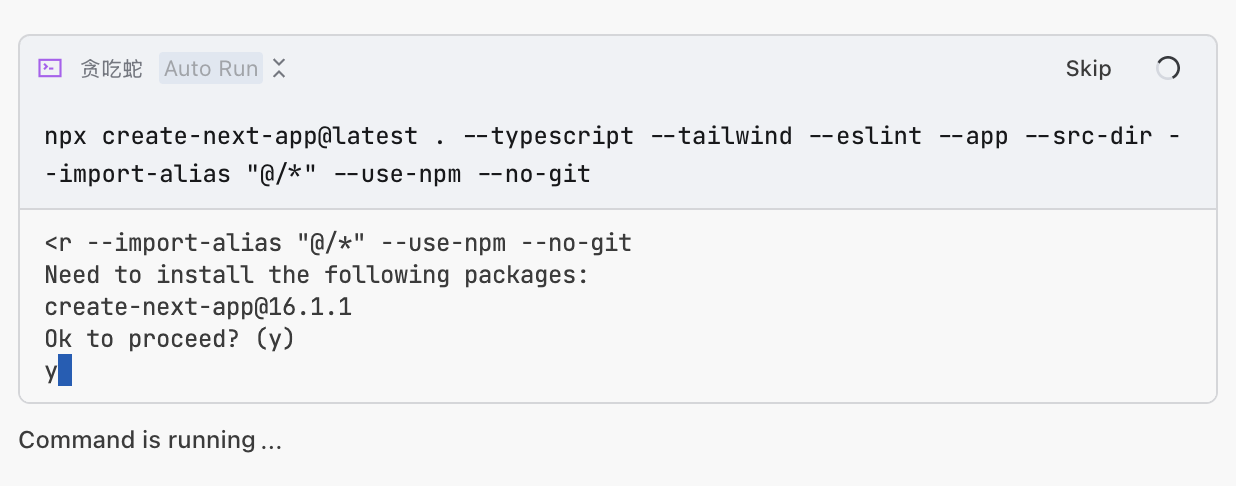
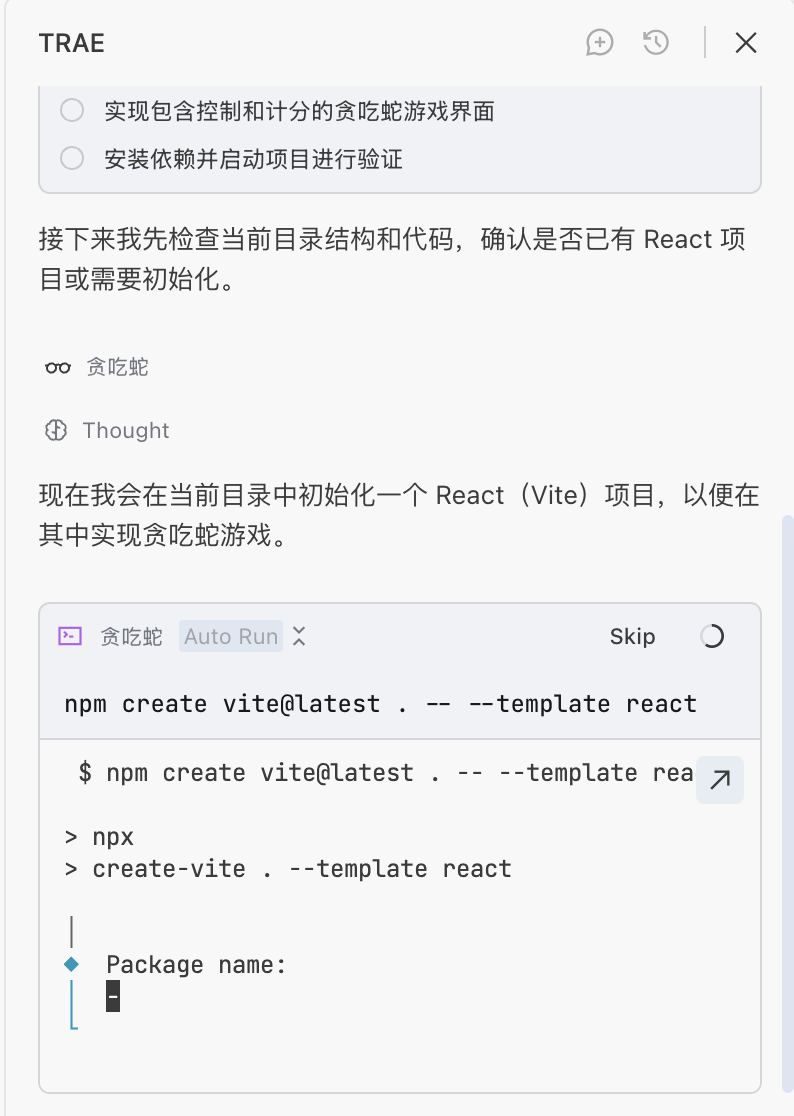
As shown, here we are creating a template but don't know how to operate. We can take a screenshot of this part and ask the large model:
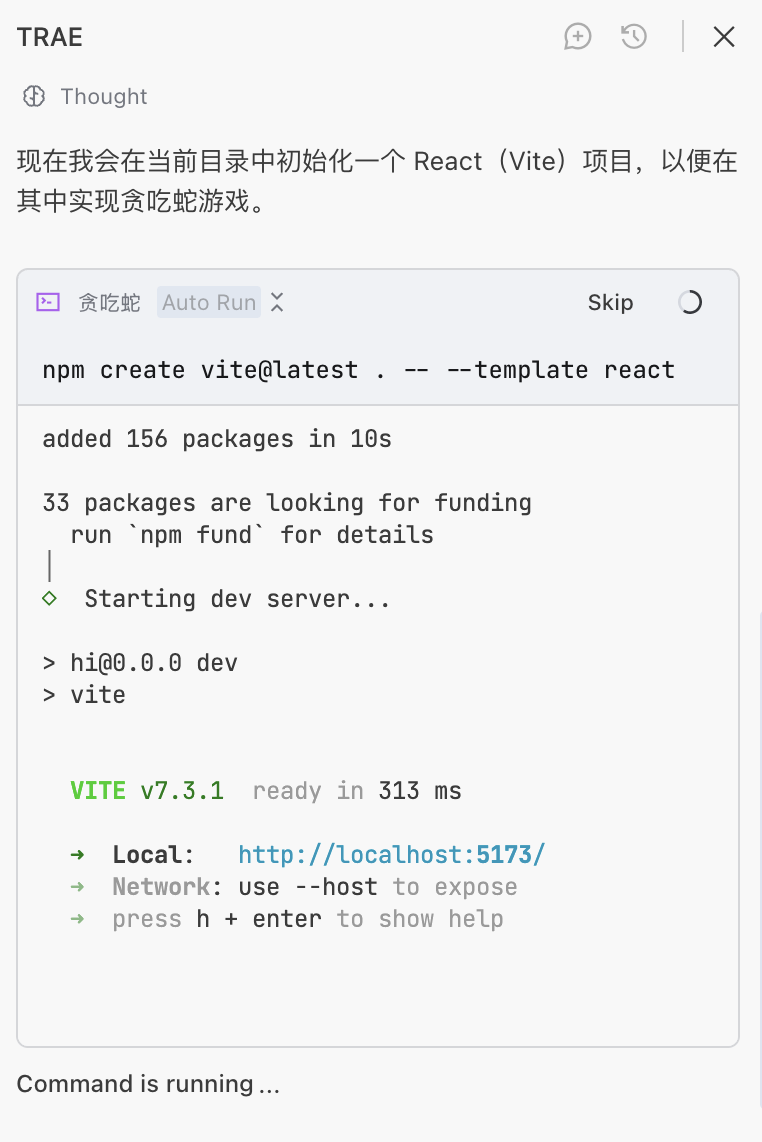
Another reason the AI Agent pauses during execution is because it has started a "service." Our Snake game itself is a type of "service." If you see a URL with the following command, it means the Agent has executed a local computer service for us. We can visit the corresponding URL to access our Snake game. Since the service needs to run continuously, it will pause here. We just need to click the Skip button.
During this process, if you encounter some terms and content you don't understand, don't worry. You can refer to the "Computer Terminology Explanation" section in the appendix, or directly consult AI, or ask questions in time!
If you encounter unexpected phenomena during the process, such as the snake not ending the game when hitting a wall, or the snake not moving after clicking start, you just need to describe the phenomenon to the sidebar Agent. If you encounter error problems, remember to take a screenshot or copy the error to the sidebar Agent. If it still can't be solved after multiple attempts, please try changing the model.
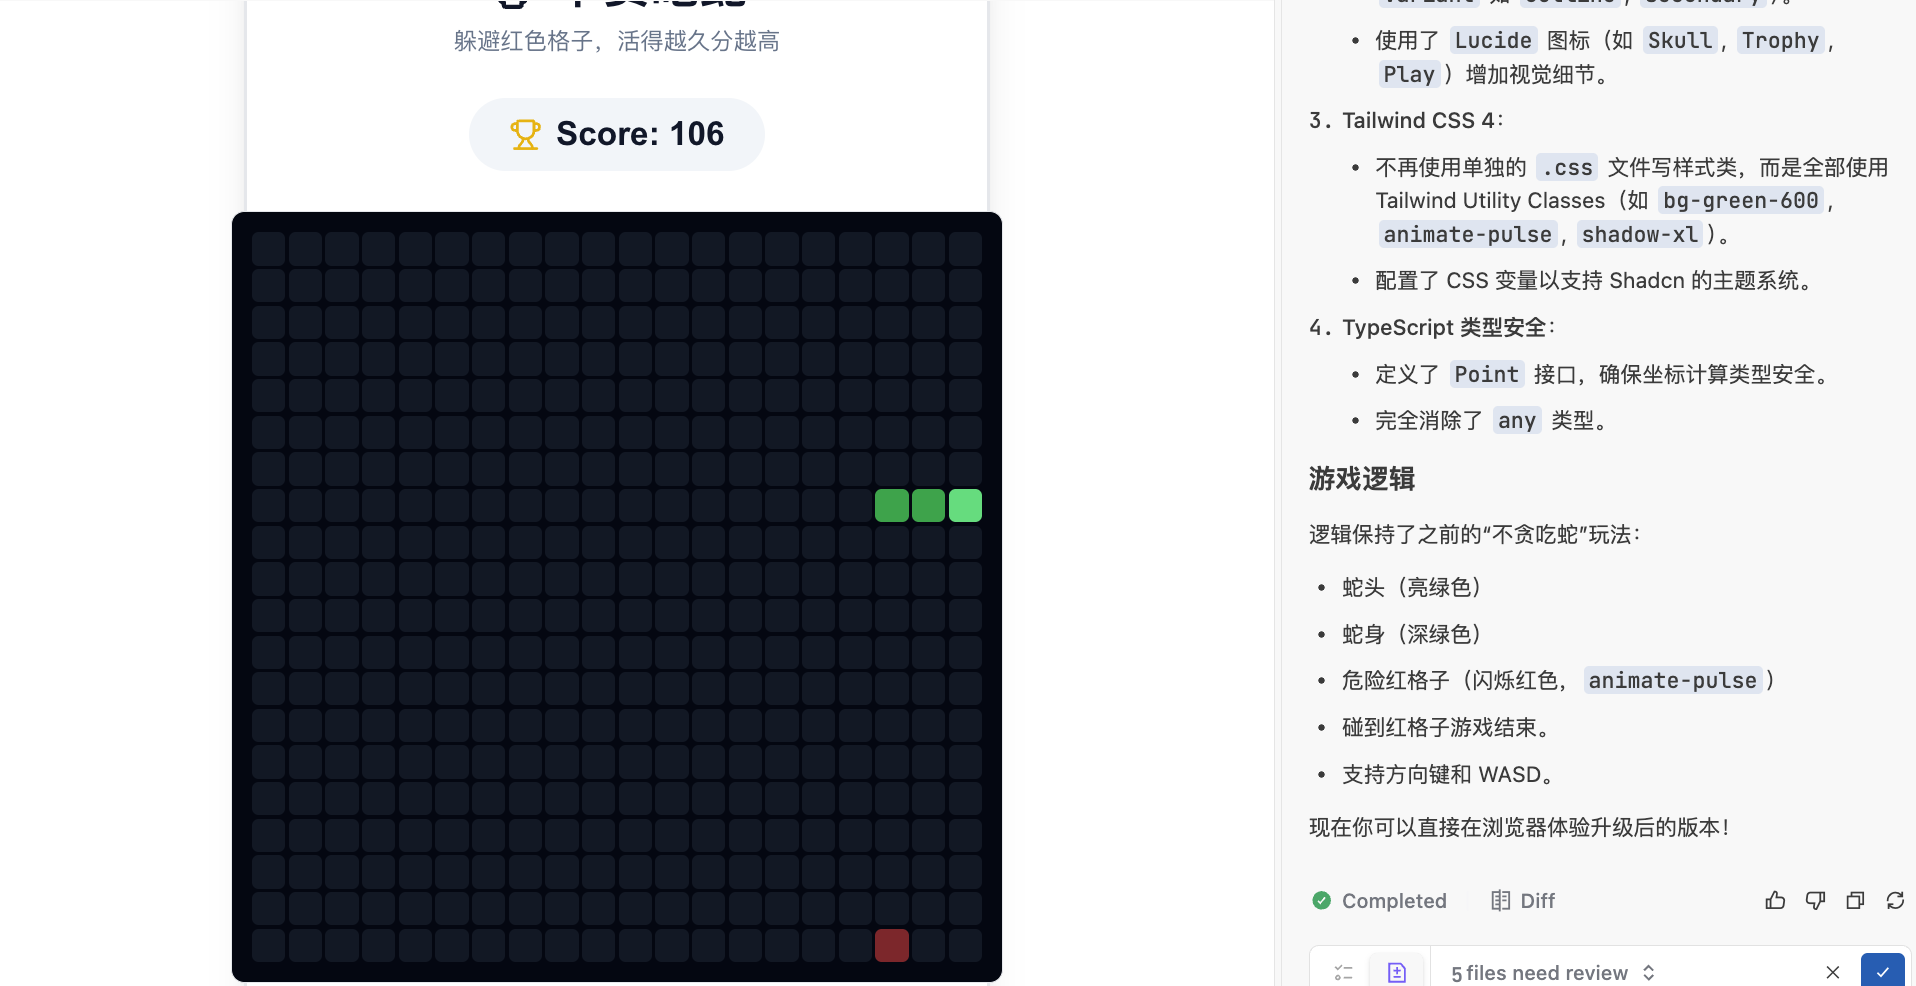
After a short while, we can get results similar to z.ai:
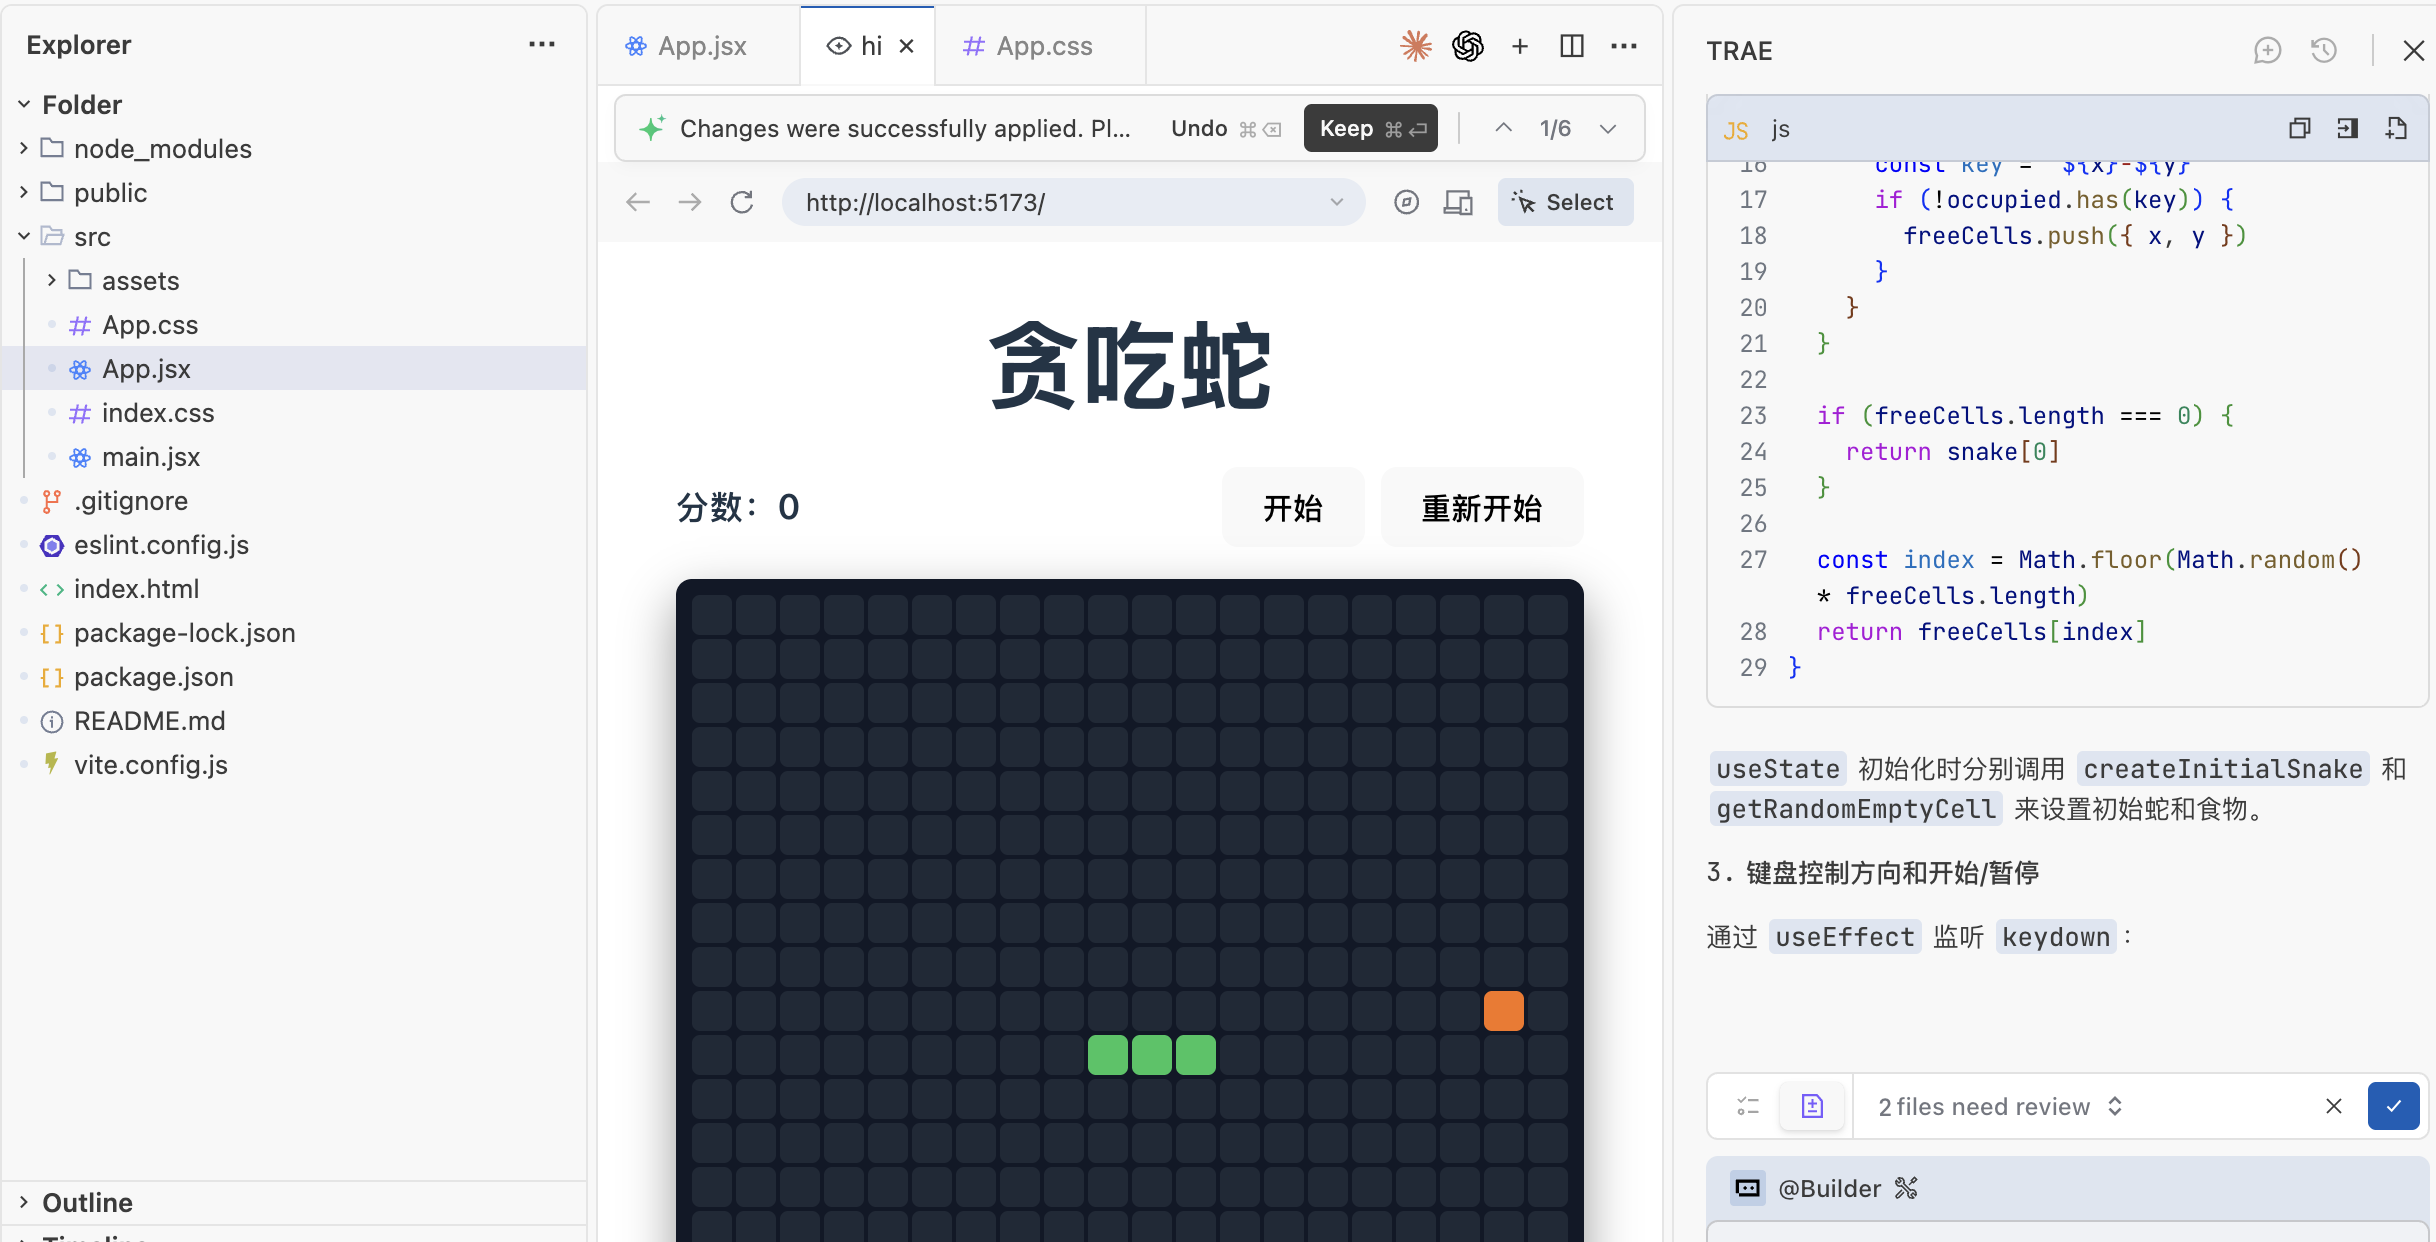
We can click the checkmark in the bottom right corner to confirm code changes, or click the Cancel button to cancel changes. Or click on the "2 files need review" area to expand and view the modified code.
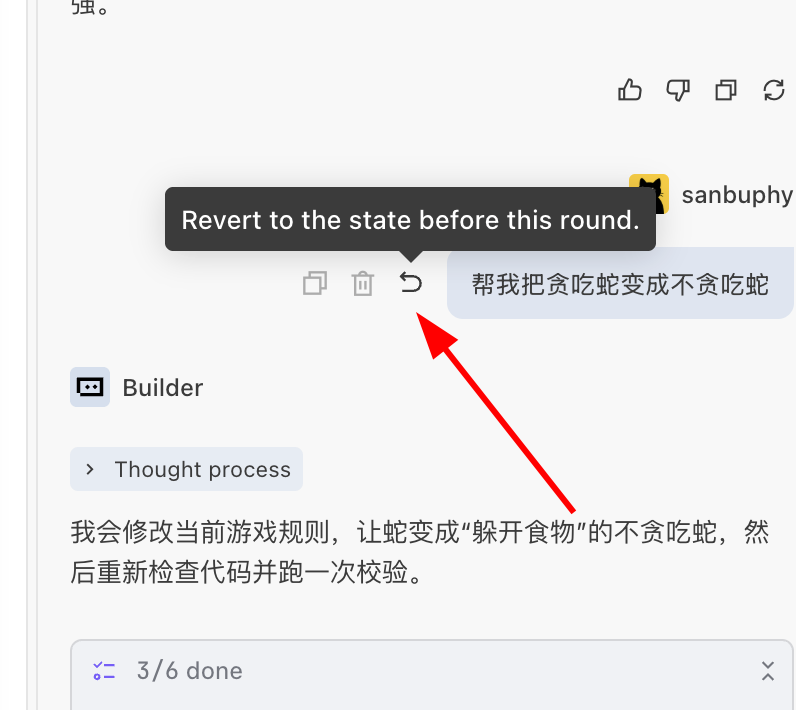
It's also worth noting that since code modifications may not always be correct, we need to know that all IDE Agents support code rollback. For example, if I accidentally made a wrong modification operation here, or if the result of this operation is unsatisfactory, after the modification is complete, we can return to the input box area and click the Revert button to roll back the operation to the state before modification. You can modify the input text for another operation:
4.4 Step 3 (Optional): Ask AI About Code Implementation Details
When the Snake game is running normally, if you're not yet familiar with frontend or React, you can continue in the same chat window and ask AI to guide you through the code in as colloquial a way as possible. You don't need to switch tools or deliberately look through documentation—just keep asking questions about the current project.
A practical approach is to have AI first give an overall explanation of "how the game moves," then break it down into specific details. For example, you can directly ask:
"Please explain from top to bottom how this Snake game moves step by step? Try to use as few technical terms as possible."
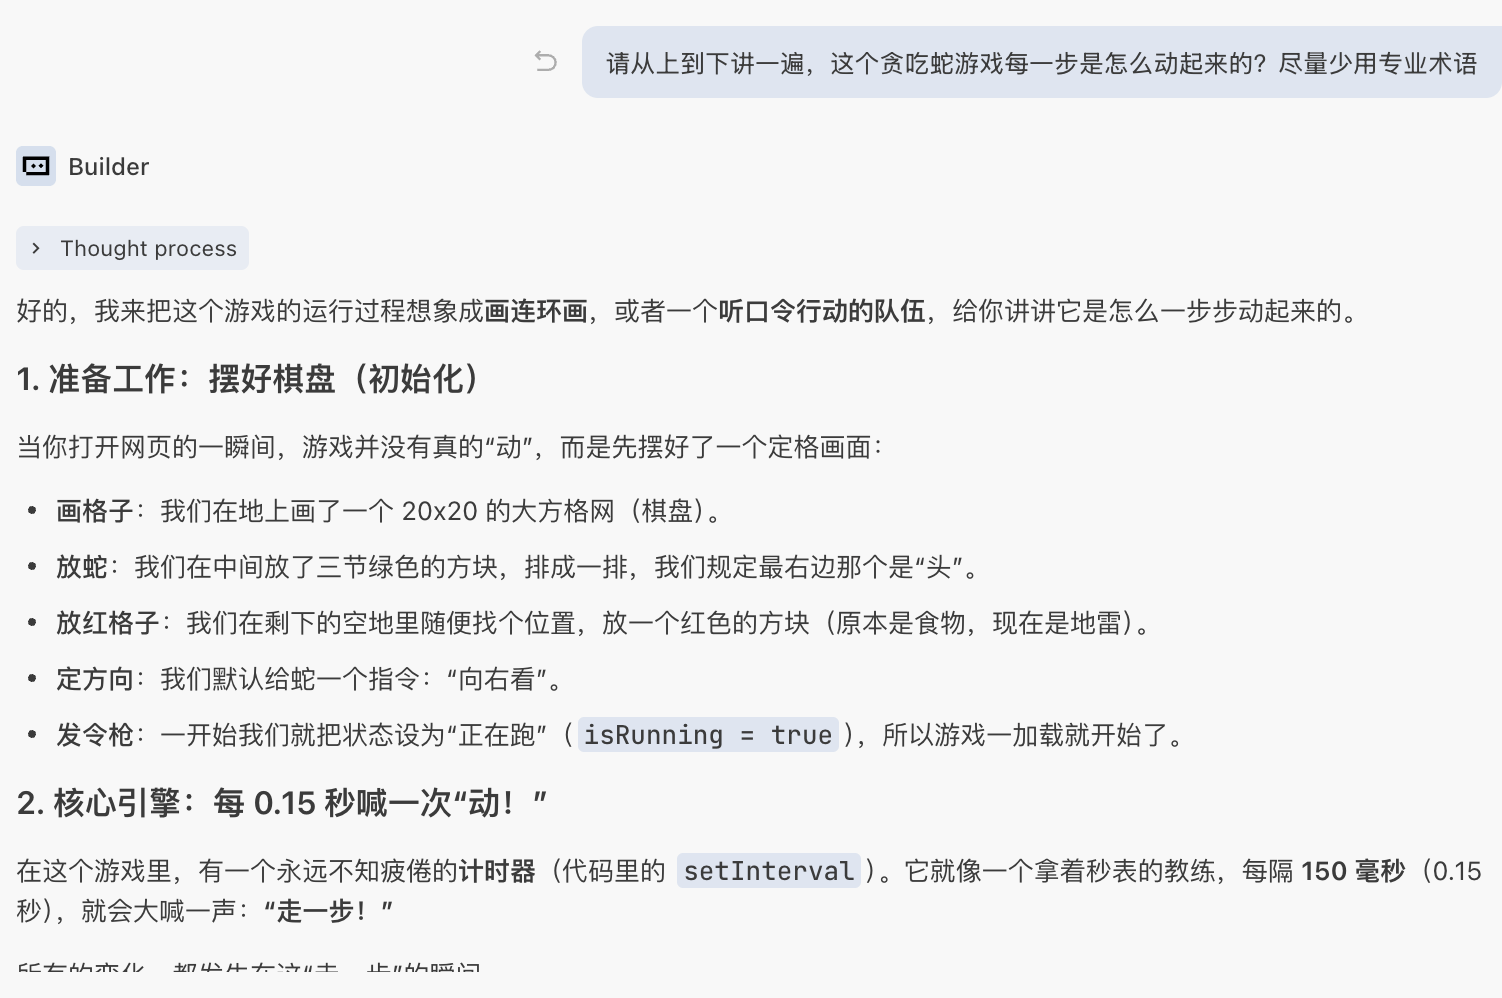
Then follow up on key points based on its answer, such as:
"What data structure is used to record each segment of the snake's body on the screen? Can you give an analogy?" "How do you control 'moving once every while'? Which section of code is this in?" "When the snake eats food, what steps do you take? Where is the logic that determines it ate something?" "Where in the code are hitting walls and hitting itself judged respectively?"
If you see a certain file (like SnakeGame.tsx) but have no idea what it's doing, you can also directly ask AI to explain it in sections:
"Please explain
SnakeGame.tsxin several functional blocks: what is each block roughly responsible for, using simpler language."
In this round of dialogue, you can treat any word you don't understand as an entry point for follow-up questions, such as:
"What exactly does 'state' mean in what you just said? Can you explain it with a real-life example?" "What does 'timer' mainly do here? What would happen if it were removed?"
Through this method, your goal is not to memorize all concepts at once, but to first understand three things: what core data exists in this game (snake, food, score, game state, etc.), when this data changes (moving, eating food, game over, etc.), and which small section of code corresponds to each change. Once these three points are clear, you can basically understand the main logic of this code.
4.5 Step 4: Have AI Make the Interface Look Better
First, a reminder for beginners: don't just tell AI "I want to make this interface look better." This statement is too vague even for human designers, let alone models—what style does "good-looking" mean, which parts need adjustment, is it a layout problem or a color problem? AI can't read all this from your one sentence. To make AI truly produce results close to what you have in mind, you need to learn to break down the vague goal of "I want it to look good" into a series of specific, executable small requirements.
For example, many people initially say something like this:
"I want to make this interface look a bit better."
Instead, you can first give a set of overall requirements:
"Please help me beautify the game interface overall:
- Center the game area, don't stick it to the top-left corner;
- Change to a lighter background color to make the snake and food more prominent;
- Enlarge the score and place it in a prominent position;
- Use blue as the main color scheme to beautify the overall color scheme and buttons."
If you want clearer feedback when the game ends, you can further supplement:
"When the game ends, please display 'Game Over' in the center of the screen, with a 'Restart' button below it that can reset the game."
AI will directly modify React components and styles based on your description. After saving, refresh the browser to see the new interface. If the effect still differs from what you imagined, you can continue making small adjustments, such as:
"Make the score a bit larger and the color more prominent." "Make the game area more compact with some margin around it." "Change the restart button to a blue rounded style, centered below the prompt."
At this stage, if a modification causes an error, you don't need to troubleshoot it yourself. Just copy the error message to the chat window, or provide a brief description like "This is the error that appeared after I beautified the interface," and let AI locate and fix it within the current project context. This way you can gradually polish a running demo into a small finished product with a clear interface and smooth interactions through the cycle of "continuous dialogue, continuous refreshing."
4.6 (Optional) Reference z.ai Architecture to Modify Snake Results
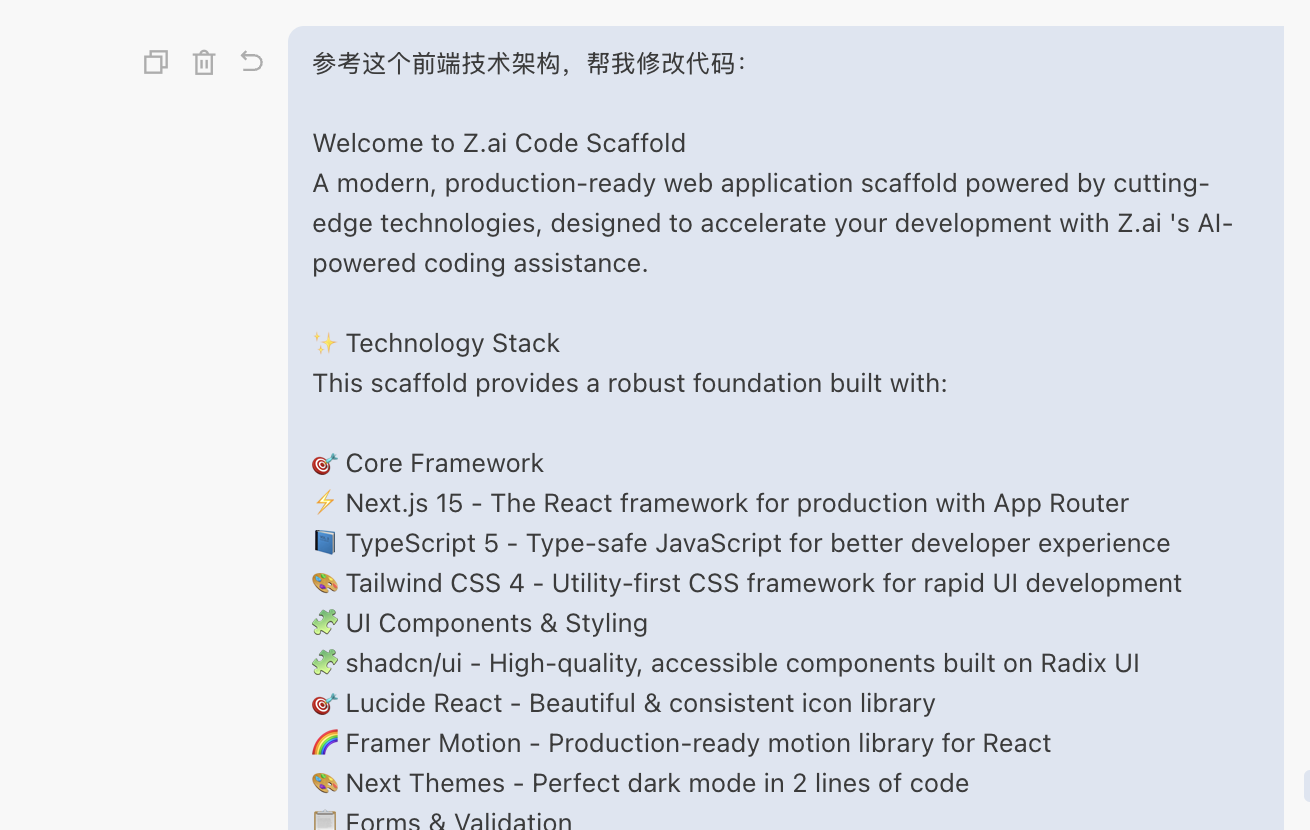
For vibe coding beginners, the hardest thing is not knowing what counts as "best practices" or what architecture is most suitable; because you don't know computer basics, you can't guide AI well. The solution to this problem is "direct reference." Remember when we said you can view code in z.ai? In fact, the corresponding README (the part used in projects to introduce functionality and technical architecture) already gives a best architecture reference:
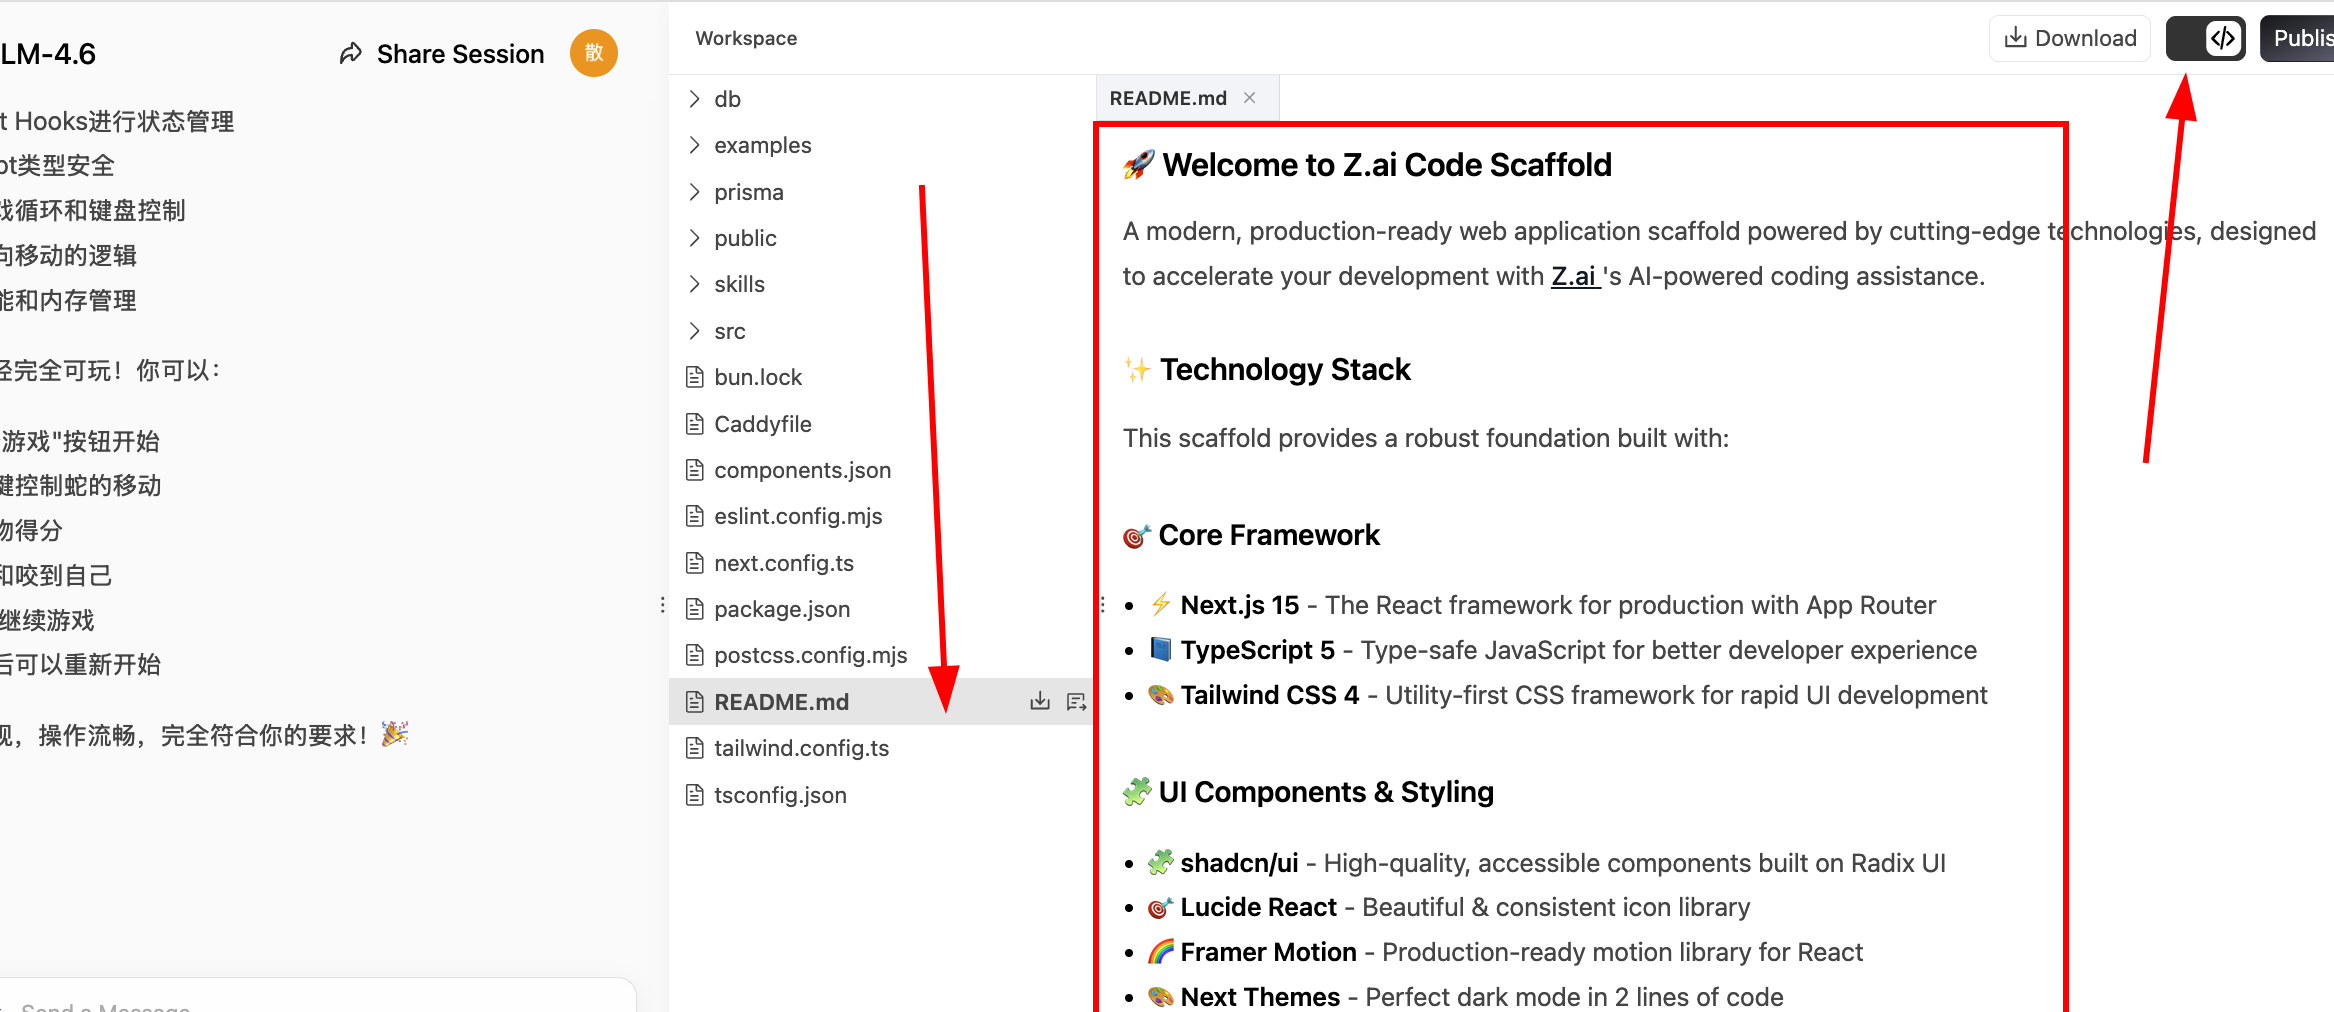
If we want the local result to match the z.ai result as closely as possible, we can copy all the content of this README and paste it into Trae's sidebar, asking it to modify the local code according to the README architecture.
Finally, we can get page design styles highly similar to z.ai:
5. What Each Button on the Interface Does
In the above operations, we've quickly run through the minimum program generation loop, but we're still not familiar with the IDE. To thoroughly familiarize ourselves with this tool that we'll be working with long-term, we'll provide in-depth explanations of every detail of the IDE in this section. Starting with the interface, different AI IDEs have slightly different interfaces, but most follow the VS Code layout.
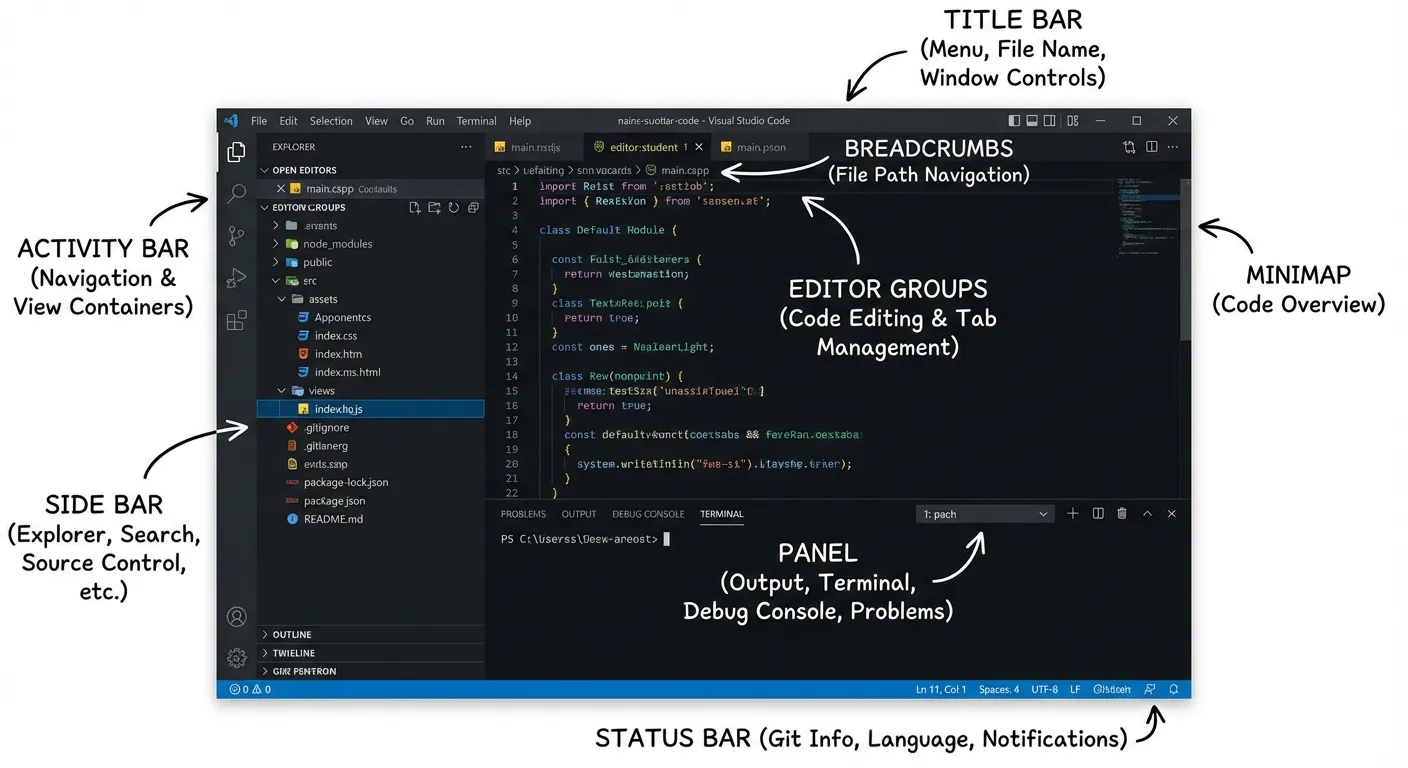
The specific function of each part is:
- Title Bar: Displays file name and window control buttons.
- Activity Bar: Switches between functional views like files and search.
- Side Bar: Displays specific content like file lists.
- Editor Groups: The core area for writing code.
- Breadcrumbs: Shows file path and supports navigation.
- Minimap: Quick preview and positioning of code.
- Panel: Contains terminal and output windows.
- Status Bar: Displays current environment status.
For more detailed explanations, please refer to the Virtual IDE Visualization section in the Appendix.
6. How to Talk to AI Effectively
As AI capabilities become stronger and stronger, we can delegate much of the "programmer writes code" work to AI. However, in actual use, you'll find that using the same AI, some people can get a working small project in a few sentences, while others chat for a long time but get results completely different from what they wanted. The difference often lies not in "who is smarter," but in—whether the way you talk to AI is specific enough and step-by-step enough. This section introduces some questioning methods suitable for complete beginners from several common scenarios, helping you more stably get usable results from AI.
6.1 Clarify Your Requirements: From "Vague Idea" to "Specific Description"
Many people, when first using AI, are accustomed to saying only one very general sentence, such as:
"Help me make a webpage." "Help me write a small program."
In this case, AI can only "imagine" what you want, so it will casually give you something that looks quite complete, but often differs greatly from what you really want to do. To make AI understand you better, you need to break down the "idea in your head" and explain it step by step.
You can supplement from these aspects:
Tell it what you're using this thing for For example, don't just say "personal website," but say:
- "I want to make a personal profile webpage with only one page of content, to send to recruiters."
Tell it roughly what blocks of content you need No need to use professional terms, just describe what you hope appears on the page, such as:
- "The page should have three sections: at the top is my name and a self-introduction sentence, the middle lists several work experiences, and the bottom puts email and WeChat ID."
Tell it your level and limitations Let AI do it in a way that beginners can accept, such as:
- "I can't write code at all, please use the simplest method so I can directly copy it into one file and open it in the browser."
Tell it how you hope to get the results For example:
- "Please give me complete code that can be directly saved as
index.htmland opened in the browser."
- "Please give me complete code that can be directly saved as
Putting it together, you can say this to AI:
"I can't write code at all and want to make a personal profile webpage with only one page of content, to send to recruiters. The page needs three sections: the top line is my name and a self-introduction sentence, the middle is several work experiences, and the bottom is email and WeChat ID.
When you clarify this information, AI can get closer to your real needs, rather than casually giving you something "that looks impressive but is useless."
6.2 Use the Right Rhythm: "Get It Running" First, Then Gradually Make It Complex
For complete beginners, the most common pitfall is: wanting to make something "very complete" and "with many features" right from the start. For example:
"Help me make a website like Taobao." "Help me make a system with registration, login, and ordering."
The result is often: AI gives you a large chunk of code, which either won't open or has errors everywhere after you copy it; you also can't understand where the problem is, and finally have to give up.
A better approach is to actively control the rhythm, letting AI follow you step by step, rather than throwing everything at you at once. You can request in this order:
First step: Ask for a "minimal example" Only check one thing: can you see something in the browser? For example:
"Please first give me the simplest example, as long as I can see a line saying 'This is my homepage' in the browser. Then tell me step by step: what should the file name be, how should I save it, and how to open it."
Second step: Slowly add complete content on this basis After you confirm "I can indeed see that line of text," then say:
"On the basis of what we just had, help me add a 'Work Experience' area and send me the complete code again. Don't just send the changed parts."
Third step: After the structure is almost done, then consider whether it looks good For example:
"Now the page can display content normally. Next, please help me beautify it a bit: center it overall, make the title larger, and use a more comfortable font. Please give me the updated complete code."
With each addition, you run it once first to confirm there really is a change before letting AI continue. This way, even if something goes wrong at any step, you can quickly return to the "previous version that was working" state without having to start completely from scratch.
6.3 Make Good Use of Screenshots and Copying: If You Can't Say It, "Throw the Screen at AI"
Many difficulties complete beginners encounter don't lie in "not knowing how to modify code," but in not knowing how to describe the problem. For example:
- A bunch of English errors suddenly pop up in the browser, which you completely don't understand.
- The webpage layout is different from what you wanted, but you don't know what words to use to describe it.
In these cases, you don't need to force out professional terms. The simplest way is to throw what you see directly at AI.
You can do this:
Copy error text When you see a string of red error messages, you can directly copy them out and say:
"This is the complete error message that appeared after I ran it. I don't understand this English, please first explain in words that ordinary people can understand what this roughly means. Then tell me what is the simplest way I should modify it now."
Show AI a screenshot If you feel "this page just looks wrong" but can't describe it, you can:
- Take a screenshot of the current page;
- Copy the entire section of code you're using to AI;
- Then explain:
"This is what the page looks like now, this is my current complete code. I originally wanted it to be a three-column layout, but now it's become one column. Please help me find the reason and give me a corrected complete code."
💡 Supplementary Note on Screenshot Functionality
It's important to note that not all AI models support "looking at pictures." This involves two different concepts:
Pure text large models (LLM): Can only process text input and cannot recognize image content. If you send it a screenshot, it will either refuse to process it or cannot correctly understand the information in the image.
Multimodal models: Can process multiple types of input such as text and images simultaneously, can "understand" the screenshots you send, and give suggestions based on the image content.
Common model capability reference (taking models available in Trae as an example):
Model Supports Image Input Doubao-Seed Series ✅ Supported GLM-4.7 / 4.6 ❌ Not Supported MiniMax-M2.1 / M2 ❌ Not Supported DeepSeek-V3.1 ❌ Not Supported Kimi-K2.5 ✅ Supported Kimi-K2-0905 ❌ Not Supported Qwen-3-Coder ❌ Not Supported Gemini Series ✅ Supported GPT Series ✅ Supported Usage suggestion: If you want AI to help you troubleshoot interface problems through screenshots, please first confirm that the model you are using supports image input. If not supported, you can use text to describe the problem, or copy and paste error messages to AI.
Encounter a webpage you like and want to make something similar No need to say "what is this layout called," just:
- Take a screenshot or copy the page's main title and paragraphs;
- Then say:
"I want to make a page with a similar structure to this, doesn't need to be exactly the same. Please help me build a similar framework with simpler code, then I'll replace the text with my own."
Simply put: you're responsible for "moving what you see to AI," then using the simplest words to say "I hope it becomes like this"; the rest of "translating into code, explaining terms, finding problems" is left to AI.
6.4 When AI-Generated Code Doesn't Work: A Universal Response Method
In actual practice, you will definitely encounter this situation: AI seriously gave you a piece of code, and you honestly copied it in, but the result is either a blank browser page or completely different from what it said. This doesn't mean you "can't learn," nor does it mean AI is completely wrong, but rather that you and AI are still missing a few rounds of "back-and-forth confirmation."
When code "doesn't work," you can follow this fixed process to talk to AI:
First clearly state "what you did + what it looks like now" Avoid just saying "won't open" or "not working." You can describe it like this:
After opening, the page is completely blank, not showing the welcome text you mentioned. I opened the relevant page, and the part I just mentioned is not there, so this still doesn't work.
Send AI your current complete code Many times the problem is: you copied one line less, or mixed content from the previous and current times together. You can say:
"Below is all the code currently in my file. Please compare to see if anything is missing, written wrong, or in the wrong order. Please directly give me a corrected complete code, don't just send a small section."
If there are error prompts, provide them together For example, errors that pop up in the top-right corner of the browser, or some red text at the bottom. You can:
- Copy out the error text;
- Or take a screenshot;
- Then say:
"This is the error prompt I see. I completely don't understand it, please first explain in simple terms what this problem roughly is, then tell me which lines need to be modified most urgently now."
Ask the other party to use "beginner mode" to explain step by step You can directly state your situation and ask it not to skip intermediate steps:
"I can't write code at all, please tell me step by step: Step 1: which line to modify, Step 2: how to save, Step 3: how to reopen or refresh the page. Please write out each step in complete sentences."
Finally, ask it to help you do a "what you should see" comparison For example:
Please first say, according to your corrected code, what content should I normally see when I open the webpage.
As long as you follow this process to interact with AI, most "code not working" situations can be resolved in a few rounds of back-and-forth. At the same time, you will gradually become familiar with common problem types, and next time you encounter similar situations, you can solve them directly.
7. Summary and Next Steps
In this chapter, you completed an upgrade from "playing an AI-generated Snake in a webpage" to "building a small game yourself with an AI IDE locally." You roughly figured out three things: why writing code can't be separated from an IDE like VS Code; on this basis, adding AI (Trae, Cursor, etc.) makes the IDE no longer just a toolbox, but adds an "intern engineer" who can understand natural language, help you create files, install environments, and modify code; and what each area of the IDE interface (left files, bottom terminal, middle editing area, right AI panel) is responsible for, so you're no longer confused when using it.
More importantly, you've actually run through a complete process once: create an empty folder locally → open with AI IDE → describe requirements in sidebar dialogue → let AI generate project and start development server → when problems occur, throw "phenomenon + complete code + error screenshot" to AI together, asking it to fix step by step in "beginner mode." In this process, you also practiced how to write more effective prompts: clarify goals, content structure, and your level, control the rhythm well, from "get it running first" to "then make it look good, make it fun."
In the next chapter, we'll shift focus from "knowing how to use tools" to "making a prototype that people actually want to use": starting from the user perspective, designing rules, interactions, and feedback, then letting AI help you turn these ideas into a product prototype.
8. 📚 Assignment: Make a More Complex Game with Local AI IDE
You've already made a Snake game with a local AI IDE. Now please challenge yourself with a slightly more complex small game, walking through the complete process of "describe requirements → generate project → run locally → debug and iterate."
- Choose a game more complex than Snake
- Could be Tetris, Whack-a-Mole, Minesweeper, 2048, Aircraft Battle, etc.
- Or a simple original game you imagine yourself
- Must use local AI IDE to complete the entire process
- Create a new empty folder and open it with AI IDE
- Describe your game requirements clearly in the sidebar chat
- Let AI be responsible for creating files, building project structure, and implementing main logic
- Start the development server locally to ensure the game can run normally
- Have basic "playability" and feedback
- At least include three states: start, in-progress, and end
- Players have clear operation methods (keyboard or mouse)
- Clear score or progress feedback on the screen
- At least 2+ rounds of iteration
- First round: let AI make a "playable" version
- Second round and beyond: gradually propose specific improvements (style, difficulty, interaction optimization, etc.)
Appendix
Appendix 1: Common Computer Terminology Quick Reference
You don't need to deliberately memorize this section. What's more important is to first establish an impression in your mind.
1. Words Related to "Tool Interface"
1. IDE, Editor, Terminal
IDE (Integrated Development Environment) You can think of an IDE as a "programmer's workbench":
- One side is a writing desk (editor),
- One side has power outlets and buttons (run, debug),
- Drawers contain various small tools (search, version management). VS Code, Trae, Cursor all belong to IDEs or tools based on IDEs.
Code Editor (Editor) More like an "advanced notepad," only responsible for:
- Letting you type code;
- Using colors to distinguish different content (syntax highlighting);
- Giving you auto-completion. The area in the IDE where you write code is the code editor.
Terminal / Command Line (Terminal / Command Line Window) A window with black background and white text, where you input commands for the computer to work:
- For example:
npm run devmeans "help me start the development server"; python main.pymeans "run this Python file." You can think of it as: "You send the computer text message commands one by one, and it replies with execution results in text."
2. Several Common Areas in the IDE
Activity Bar The row of small vertical icons on the far left, like "function tabs":
- Click file icon → file list displays on the left;
- Click magnifying glass icon → left becomes search;
- Click Git icon → left displays version management.
Side Bar The large area to the right of the Activity Bar, specifically displaying content for the current mode:
- File mode: shows files and folders in the project;
- Search mode: shows search results list;
- Source control mode: shows which files have been modified.
Editor Area The largest area in the middle, where you actually see and modify content after opening a file; The tabs above are "which files are currently open."
Panel Generally at the bottom, common types include:
- Terminal: input commands to run projects;
- Problems: lists error files and line numbers;
- Output: some tool-printed runtime information;
- Debug Console: output during debugging.
Status Bar The thin bar at the very bottom:
- Displays what language the current file is (JS, HTML, Python, etc.);
- Displays whether indentation is "2 spaces" or "4 spaces";
- Displays whether there are errors, what the current Git branch is. You can think of it as "a small health check of the current editing environment."
2. Words Related to "Webpage / Network / Service"
1. URL, HTTP, Port, Local Service
URL (Web Address) That string of things in the browser address bar, such as:
https://www.trae.cn/http://localhost:3000/It's like "the complete address of a room in the internet world."
HTTP / HTTPS The http:// or https:// you see at the beginning of a URL:
- HTTP: ordinary transmission method;
- HTTPS: adds a layer of encryption, more secure. You can first remember: "When writing webpage addresses, usually start with
httporhttps."
Port (Port) You can imagine a computer as a building, and ports are room numbers for each room:
:3000means room 3000;- The same computer can run multiple services simultaneously, each occupying a port.
http://localhost:3000means "access the service running in room 3000 on my own computer."
Local (Local / localhost) Refers to your own computer.
localhostcan be understood as "this machine itself." When you accesshttp://localhost:3000, you're actually interacting with a program running on your own computer, not accessing someone else's server online.
Service (Service / Server) A "service" is a program that keeps running in the background, always listening for your commands:
- Web service: when a browser accesses an address, it returns webpage content;
- Game service: responsible for managing matches, saves, leaderboards, etc. Executing
npm run devin the terminal to start a project is essentially "opening a web service locally."
3. Words Related to "Frontend / Backend / Data"
1. Frontend, Backend
Frontend The part that users can see and click:
- Buttons, text, images, animations on webpages;
- Pages written in React / Vue. Responsible for displaying interfaces and responding to user operations (clicks, inputs, drags, etc.).
Backend The part that users cannot see, running on the server:
- Storing and reading data (user information, orders, scores, etc.);
- Executing business rules (login verification, permission judgment). You can think of frontend as "storefront and clerk," and backend as "warehouse and ledger system."
2. Interface, Request, Response, JSON
Interface / API A set of "question + answer" rules agreed upon in advance between frontend and backend.
- Frontend says: "I'll ask you using this address, this format";
- Backend says: "I'll return results to you in this format."
Request (Request) A "question" sent from frontend to backend:
- Where is the request going (URL);
- What method is used (GET, POST, etc.);
- What parameters are brought (such as user ID).
Response (Response) The "answer" given by backend to frontend:
- Status code (200 success, 404 not found, 500 server error);
- Actual data (mostly JSON).
JSON A format for representing data using syntax very similar to JavaScript code, such as:
{
  "name": "Alice",
  "score": 120
}
Can be understood as "a machine version of key-value notepad," often used by frontend and backend to exchange data.
4. Words Related to "Writing Code Itself"
1. Variable, Identifier, State
Variable (Variable) "A label attached to a piece of data."
- For example, recording the score as
score; - Later using the name
score, you can read and write this data:
let score = 0
score = score + 10
Identifier (Identifier) A general term for "various names you give yourself":
- Variable name:
score - Function name:
moveSnake - Component name:
SnakeGameLike naming folders "Photos," "Work," "Bills" for easy distinction between different "things" in code.
State (State) The "key situation record" of the program's current state:
- Whether the game has ended;
- Which grid the snake is currently on;
- What the current score is. In React, it's generally understood this way: when state changes, the interface must follow and update.
2. Function, Component, Module
Function (Function) Package something that "can be done repeatedly" and give it a name:
function sayHello(name) {
  console.log('Hello, ' + name)
}
Later, just writing sayHello('Bob') equals executing those lines again.
Component (Component) In frontend, "a small interface + small logic that can be reused":
- A button can be a component;
- A top navigation can be a component;
- The entire game area can also be a component. Components can be assembled together, like building with LEGO.
Module (Module) "A file composed of a group of related codes":
snakeLogic.tsspecifically stores code related to "how the snake moves";score.tsspecifically stores code for calculating scores. Modules can "import / export" between each other, like tools in different drawers.
3. Syntax, Programming Language, Framework
Syntax (Syntax) The "grammar rules" and "punctuation habits" of a programming language:
- Strings need quotes;
- Whether to write a semicolon at the end of each statement;
- Code blocks need to be wrapped in
{}. Writing syntax errors, compilers / interpreters will directly report "syntax errors."
Programming Language (Programming Language) A complete set of rules and vocabulary for communicating with computers, such as:
- JavaScript, Python, Java, C++, Go... Different languages are suitable for different things, have different writing styles and tool ecosystems.
Framework (Framework) A large set of code and patterns that others have "pre-built the skeleton" for you:
- Frontend: React, Vue (helping you handle interface updates, state management, etc.);
- Backend: Django, Spring Boot, etc. You're essentially "filling in content on a ready-made skeleton," much easier than building from scratch.
5. Words Related to "Debugging / Troubleshooting"
1. Bug, Error, Log / console.log
Bug When program behavior differs from what you expect, that's a bug:
- Buttons that should appear don't appear;
- Should add 10 points but added a bunch more;
- Page shows white screen as soon as it opens.
Error Message (Error Message) That "scary-looking" English that appears on the screen / in the terminal after a program crashes. Although ugly, it usually tells you:
- Roughly where the error is;
- Which file, near which line needs checking. You can directly copy it and throw it to AI for translation and analysis.
Log (Log) What the program "says" during operation. Most common in frontend is:
console.log('Current score', score)You can think of it as: actively reporting numbers at key steps to confirm whether the program is running as you expect.
What is console.log?
consolecan be understood as "a small blackboard for debugging";.logis "writing a line on the small blackboard";- Press F12 in the browser to open the Console panel in developer tools to see these outputs.
2. Debug, Breakpoint, Step-by-Step Execution, Snapshot
Debug (Debug / Debugging) When a program has problems, instead of randomly modifying:
- Let the program pause at a certain line (breakpoint);
- Look at the value of each variable at the moment;
- Walk through step by step, observing "where it starts to go wrong."
Breakpoint (Breakpoint) You can think of a breakpoint as "a pause button inserted at this line":
- Programs normally run all the way through;
- When running to the line where you inserted the breakpoint, it will temporarily stop and wait for your inspection.
Step-by-Step Execution (Step) After stopping from a breakpoint, you can choose:
- Execute line by line (step over);
- Go inside a certain function to see details (step into). Like watching a dance broken down into moves, rather than watching a fast-forward video directly.
Snapshot (Snapshot) — Simplified Understanding Here "snapshot" can be understood as:
Taking a photo of the "current state" at a certain point in time for future comparison. In actual tools, "snapshot" may refer to:
- The complete state of the project at the moment of a commit;
- The overall situation of memory / variables at a certain point during debugging. Just remember this analogy for now: snapshot ≈ a photo of state at a certain moment.
6. Words Related to "Project Management"
1. Project, Workspace, Folder
Project (Project) For implementing an application, placed in the same folder:
- Source code files
- Configuration files
- Assets (images, audio, etc.)
Workspace (Workspace) A concept used by VS Code / Trae to describe "what group of things is currently open this time":
- Opening a folder → a simple workspace;
- Sometimes multiple folders are combined into a multi-project workspace.
2. Git, Repository, Commit
Git (Version Control Tool) Can be understood as a "time machine" for projects:
- After each batch of modifications, you can "take a version photo";
- When needed in the future, you can return to a certain historical state.
Repository (Repository / Repo) After enabling Git, that project folder with "version records" is called a "repository."
Commit (Commit) Every time you feel "this round of modifications counts as a meaningful milestone," you can:
- Write a description (such as:
Add score panel); - Package all current modifications into a version;
- Git will save the state at this moment. This action is called "making a commit."
7. Words Related to "AI Development Tools"
1. AI IDE, Agent, SOLO Mode
AI IDE On the basis of ordinary IDEs, adds a layer of AI that "can understand human language and take action itself":
- You say "make a Snake game," it can help you set up the project, write code;
- You give it a screenshot of an error, it can first explain then try to fix;
- It can modify across multiple files together, not just complete line by line.
Agent (Agent) You can think of an Agent as an AI junior engineer on long-term standby:
- Will read your project structure;
- Will break down tasks (install dependencies first, then generate code, then run project);
- After errors occur, will adjust plans based on error information.
SOLO Mode (taking Trae as an example) Means:
You only need to clearly state the "destination," It plans the "route" itself, Executes step by step locally, Only asks whether to continue at key nodes midway.
2. Model, Key (API Key)
Model (Model, here specifically referring to large language models) This word can be simply understood as "that big AI brain behind it":
- Such as GPT, Claude, Kimi, GLM, etc.;
- Different models have different levels in "understanding Chinese," "writing code," "reasoning";
- AI IDEs usually allow switching between different models in dropdown menus.
Key / API Key You can understand an API Key as a very long "advanced password + ID number," Its only function is:
Tell someone else's server: "I'm which user, please allow me to use your AI service, and help me keep accounts."
Key points:
- This thing is usually a long string of random letters and numbers;
- Can't be sent to public places (repositories, screenshots, group chats), others can impersonate your account if they get it;
- Filling in the API Key in the tool is like "inserting the key into the lock," after which the tool can help you call the corresponding AI service.
8. Words Related to "Browser / Developer Tools"
Chrome (Google Browser) One of the most commonly used browsers for frontend development now:
- Opens webpages fast;
- Comes with relatively strong "developer tools" for easy problem checking.
Refresh (Refresh / Reload) Reload the current webpage:
- After modifying frontend code, if there are no automatic refresh tools, you need to manually refresh to see the effect.
Developer Tools (DevTools) A set of tool panels in the browser specifically for developers:
- View webpage structure (Elements);
- View styles (Styles);
- Check errors and logs (Console);
- Check network requests (Network). In Chrome, usually opened by pressing
F12orCtrl+Shift+I.
Console (Console) A tab in developer tools, specifically displaying:
- The output of your
console.log(...); - Errors that occurred during operation (red text). You can think of it as "the program's chat box":
- When the program has something to say, it writes here;
- This is what you most often look at when debugging.
If you encounter new words in the learning process later, you can also have AI assist you in supplementing all content in this style:
- First write a sentence about "what it does";
- Then write a sentence about "what you can imagine it as";
- Finally give a particularly simple small example. This way your "personal glossary" will grow longer and more practical, gradually enabling better communication with computers.
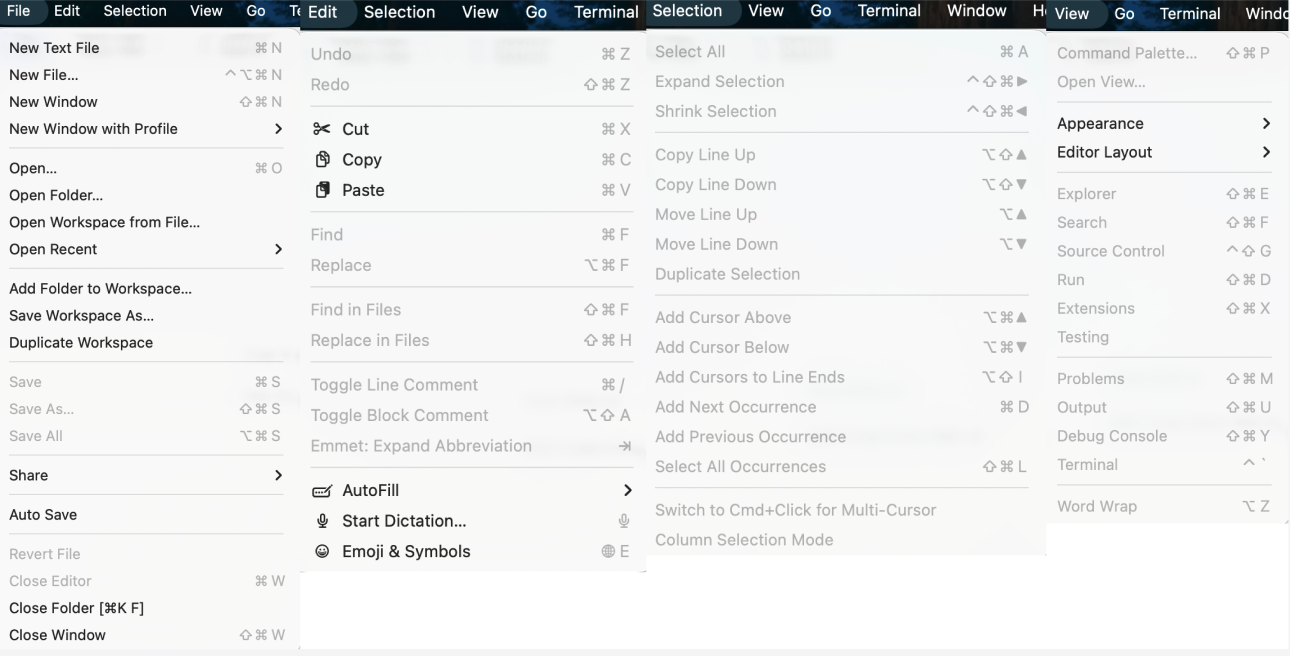
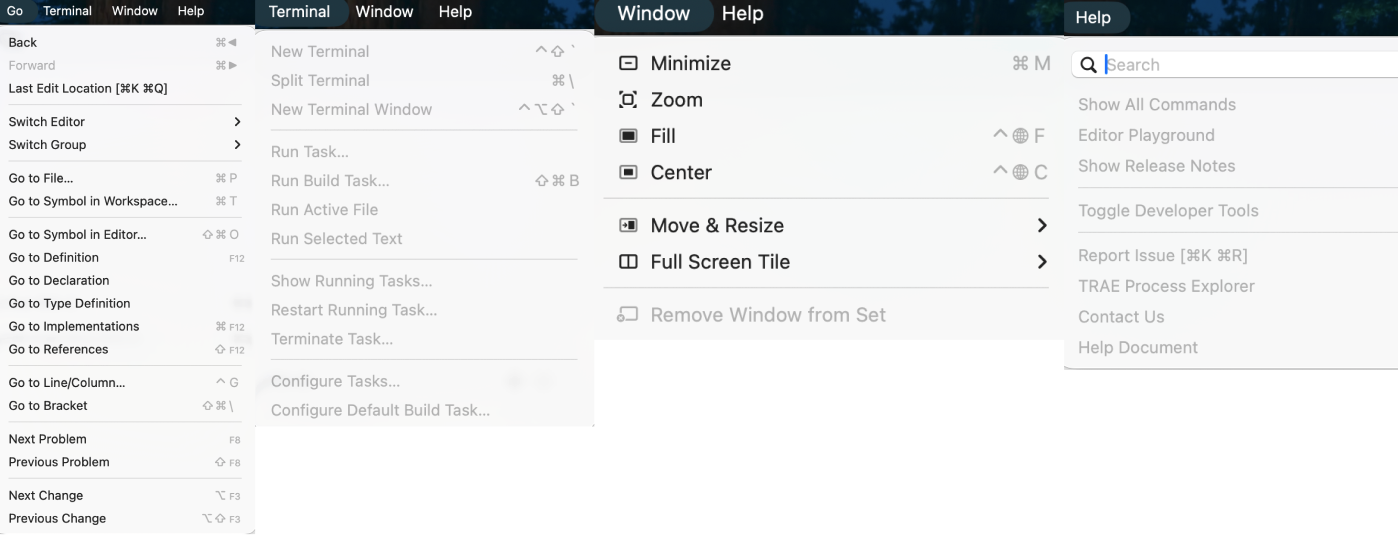
Appendix 2: Visual Studio Code Menu Bar Analysis
To help everyone understand the meaning of each option, here we provide an in-depth analysis of the menu bar: